Delta Controls Thermostat User Manual: An Overview
Delta Controls thermostats offer advanced HVAC management, integrating seamlessly with Freebox Delta and utilizing Cat6 cabling for optimal connectivity. Users report varied experiences,
from successful Amazon Prime integration to occasional disconnections and sound issues, requiring troubleshooting and potential firmware updates.
Delta Controls thermostats represent a sophisticated approach to home climate management, often integrated within broader smart home ecosystems like Freebox Delta. These devices aim to provide precise temperature regulation and energy efficiency. User feedback highlights a range of experiences, from straightforward setup with existing Amazon Prime accounts to challenges with consistent connectivity and audio performance.
Successful implementation often relies on robust network infrastructure, such as Cat6 cabling, ensuring stable data transfer. Understanding potential issues – like intermittent disconnections impacting TV recording – is crucial for optimal user experience. Regular software updates are recommended to address reported bugs and enhance functionality.
Understanding the Delta Controls Ecosystem
The Delta Controls ecosystem extends beyond the thermostat itself, frequently interfacing with platforms like Freebox Delta, offering bundled services such as Amazon Prime access. This integration aims for a streamlined user experience, though reports suggest varying success rates with service compatibility. A stable network foundation, utilizing cabling like Cat6, is vital for reliable performance.
Users should anticipate potential challenges, including occasional disconnections affecting recording functionality. The system’s responsiveness to updates and its interplay with other smart home devices are key considerations for a cohesive and efficient climate control setup.
Installation and Setup
Proper installation requires careful wiring, potentially utilizing Cat6 cabling for network connectivity, and ensuring a stable connection to systems like Freebox Delta for optimal function.
Wiring Diagrams for Common HVAC Systems
Understanding your HVAC system’s wiring is crucial for successful thermostat installation. Diagrams vary significantly based on system type – conventional, heat pump, or multi-stage.
Carefully identify existing wiring before disconnecting the old thermostat, labeling each wire clearly. Common wires include Rh, Rc, W, Y, G, and C.
The ‘C’ wire, providing constant power, is often essential for Delta Controls thermostats.
Refer to the detailed wiring schematics included in the manual, matching your specific system configuration. Incorrect wiring can damage both the thermostat and your HVAC equipment, potentially causing system failure or safety hazards. Always consult a qualified HVAC technician if unsure.
Mounting the Thermostat – Step-by-Step Guide
Begin by turning off power to your HVAC system at the breaker. Remove the existing thermostat’s faceplate, carefully disconnecting the wires – labeling each is vital! Mount the Delta Controls thermostat baseplate using the provided screws, ensuring it’s level.
Feed the wires through the baseplate opening and connect them to the corresponding terminals, referencing your wiring diagram. Attach the thermostat faceplate securely. Restore power at the breaker. Verify proper mounting and wire connections before proceeding to configuration.
Initial Power-Up and Configuration
Upon restoring power, the Delta Controls thermostat should illuminate. Follow the on-screen prompts to select your language and time zone. Connect to your Wi-Fi network – a stable connection is crucial for smart home integration, like Amazon Alexa or Google Assistant.
Register your device through the mobile app (iOS or Android). Configure your HVAC system type (heating, cooling, or both). Calibrate the temperature sensor if needed, ensuring accurate readings. Test basic functionality to confirm proper operation.

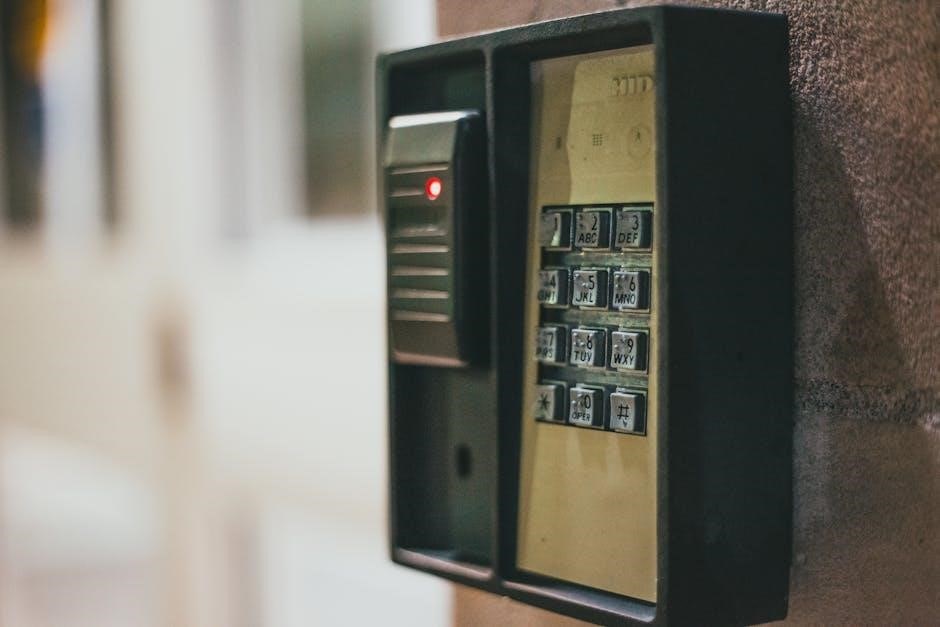
Thermostat Interface and Navigation
The Delta thermostat features a touchscreen interface for intuitive control. Users access settings via a menu system, managing schedules and modes easily. Consistent operation relies on stable connectivity.
Display Overview and Icon Meanings
The Delta Controls thermostat display provides crucial system information at a glance. Key elements include current temperature, setpoint temperature, operating mode (heat, cool, auto, off), and fan status. Iconography clearly communicates system state; for example, a flame icon indicates active heating, while a snowflake signifies cooling.
Connectivity status is also visually represented, alerting users to Wi-Fi connection strength or potential network issues. Further icons denote scheduling activity, hold status, and any active alerts or error codes. Understanding these icons is vital for efficient operation and troubleshooting, ensuring optimal comfort and energy management. A clear display contributes to a user-friendly experience.
Menu Navigation and Settings Access
Accessing the Delta Controls thermostat’s menu is typically achieved through a dedicated “Menu” button or a touchscreen interface. Navigation utilizes directional arrows or swipe gestures to scroll through options. Core settings include temperature scales (Celsius/Fahrenheit), date and time configuration, and system settings related to HVAC equipment.
Advanced settings, often password-protected, allow customization of scheduling parameters, fan control logic, and calibration adjustments. Users can also manage network connections and access firmware update options within the menu. A logical menu structure ensures intuitive access to all configurable parameters, enhancing user control.
Understanding the Touchscreen Interface
The Delta Controls touchscreen interface prioritizes intuitive operation. Key displays showcase current temperature, setpoint, operating mode (heat, cool, auto), and fan status. Tapping icons provides direct access to frequently used functions like temperature adjustment and schedule overrides.
Swipe gestures navigate between screens, revealing detailed settings and historical data. Visual cues, such as color-coded indicators, communicate system status at a glance. The responsive touchscreen ensures accurate input, while a clear layout minimizes accidental selections, enhancing overall usability and control.

Programming and Scheduling
Delta Controls thermostats enable customized comfort through flexible scheduling options, including basic setups and advanced 7-day programming for tailored temperature control throughout the week.
Setting Up Basic Schedules
Establishing a basic schedule with your Delta Controls thermostat is straightforward. Begin by accessing the scheduling menu through the touchscreen interface. Typically, you’ll define periods like ‘Wake,’ ‘Leave,’ ‘Return,’ and ‘Sleep,’ assigning desired temperatures to each.
Consider your daily routine when setting these times; accuracy ensures optimal comfort and energy savings. Most models allow copying settings to multiple days for convenience. Remember to save your changes after each adjustment. Initial setup might involve selecting a pre-programmed schedule as a starting point, then customizing it to your preferences.
Advanced Scheduling Options (7-Day Programming)
Delta Controls’ 7-day programming offers granular control over your HVAC system. Unlike basic schedules, each day can have a unique temperature profile, accommodating varied weekly routines. Access this feature within the scheduling menu, selecting the ‘Advanced’ or ‘7-Day’ option.
You’ll define multiple periods per day, specifying start times and target temperatures. This is ideal for households with irregular schedules or specific comfort needs on certain days. Save each day’s configuration individually, ensuring all settings are correctly applied before exiting the menu.
Creating and Managing Multiple Schedules
Delta Controls thermostats allow for the creation and storage of multiple schedules, catering to diverse needs like ‘Home,’ ‘Away,’ ‘Sleep,’ or ‘Vacation.’ Access the schedule management section through the main menu, typically labeled ‘Schedules’ or ‘Programming.’
To create a new schedule, select ‘Add Schedule’ and define its name and settings. You can then copy existing schedules as a starting point, modifying them as needed. Easily switch between schedules via the thermostat interface or mobile app, optimizing comfort and energy savings based on your current situation.

Operating Modes and Features
Delta Controls thermostats support heating, cooling, and auto modes, alongside fan control options like ‘Auto,’ ‘On,’ and ‘Circulate.’ Utilize hold functions for temporary temperature overrides, ensuring comfort.
Heating and Cooling Modes Explained
Heating mode activates your heating system when the thermostat detects a temperature below the setpoint, providing warmth and comfort. Conversely, cooling mode initiates the air conditioning when temperatures exceed the desired level, ensuring a cool environment. The auto mode intelligently switches between heating and cooling, maintaining a consistent temperature based on your preferences and external conditions.
Delta Controls thermostats efficiently manage temperature transitions, optimizing energy usage. Users have reported successful integration with Freebox Delta systems, enhancing control. Addressing potential sound issues or disconnections, as some users experienced, ensures optimal performance in both heating and cooling cycles. Proper cabling, like Cat6, supports reliable operation.
Fan Control Options (Auto, On, Circulate)
Auto mode synchronizes the fan with heating or cooling, providing efficient airflow only when needed. Selecting On mode keeps the fan running continuously, promoting consistent temperature distribution throughout your space. The Circulate mode operates the fan at a low speed periodically, even when heating or cooling isn’t active, improving air mixing and preventing temperature stratification.
Delta Controls thermostats, often integrated with systems like Freebox Delta, offer these flexible fan controls. Users should ensure stable connectivity, addressing potential disconnections reported by some, for reliable operation. Utilizing appropriate cabling, such as Cat6, supports consistent performance across all fan settings.
Hold Function and Temporary Overrides
Hold functions allow users to temporarily override programmed schedules, maintaining a desired temperature indefinitely or for a specified duration. Temporary overrides offer short-term adjustments without disrupting the established schedule, reverting automatically after a set period. These features provide convenient control, adapting to changing needs and preferences.
Delta Controls thermostats, often used with Freebox Delta setups, benefit from stable connections to ensure reliable override functionality. Addressing reported disconnections is crucial. Proper cabling, like Cat6, supports consistent operation, preventing interruptions during temperature adjustments.

Connectivity and Smart Home Integration
Delta Controls thermostats connect via Wi-Fi, integrating with mobile apps (iOS/Android) and platforms like Amazon Alexa and Google Assistant for seamless smart home control.
Connecting to Wi-Fi Networks
Establishing a Wi-Fi connection is crucial for remote access and smart home integration with your Delta Controls thermostat. Ensure a stable 2.5Gb/s connection, potentially utilizing Cat6 cabling run through walls for optimal performance, as some users have successfully implemented.
The initial setup involves accessing the thermostat’s menu, selecting the Wi-Fi option, and scanning for available networks. Input your network password carefully. Troubleshooting connectivity issues may involve restarting both the thermostat and your router. Consistent disconnections, reported by some users, might necessitate firmware updates or contacting support.
Mobile App Integration (iOS and Android)
Delta Controls offers a dedicated mobile application, compatible with both iOS and Android devices, enabling remote thermostat control and monitoring. This app mirrors the touchscreen interface, allowing users to adjust settings, view temperature readings, and manage schedules from anywhere with an internet connection.
Integration often requires a successful Wi-Fi connection, as detailed previously; Users can leverage features like temporary overrides and hold functions through the app. While generally reliable, some report occasional disconnections, potentially linked to network stability, mirroring issues experienced with the thermostat itself.
Compatibility with Smart Home Platforms (Amazon Alexa, Google Assistant)
Delta Controls thermostats boast compatibility with popular smart home ecosystems, including Amazon Alexa and Google Assistant. This integration allows for voice control of temperature settings, enhancing convenience and accessibility. Users can adjust the thermostat using simple voice commands, such as “Alexa, set the temperature to 72 degrees.”
However, successful integration relies on a stable Wi-Fi connection and proper account linking within the respective smart home apps. Some users report challenges with consistent responsiveness, potentially requiring troubleshooting or firmware updates to ensure seamless operation.

Troubleshooting Common Issues
Delta Controls thermostat problems include power failures, connectivity drops, and sound variations, especially with Freebox Delta. Cat6 cabling and firmware updates may resolve these issues.
Thermostat Not Powering On
If your Delta Controls thermostat fails to power on, begin by verifying the power source. Ensure the HVAC system’s breaker hasn’t tripped and that the thermostat wiring is secure. Check for loose connections, particularly if recent installations or modifications occurred.
Users experiencing similar issues with Freebox Delta setups have noted intermittent power fluctuations. Confirm the thermostat is receiving adequate voltage. If the problem persists, consult a qualified HVAC technician to inspect the wiring and power supply. A faulty transformer or wiring issue could be the root cause, requiring professional attention.
Connectivity Problems and Solutions
Experiencing connectivity issues with your Delta Controls thermostat? First, confirm your Wi-Fi network is functioning correctly. Ensure the thermostat is within range of the router and that the correct password has been entered. Users report utilizing Cat6 cabling for stable connections, suggesting a wired option if Wi-Fi proves unreliable.
If problems persist, try restarting both the thermostat and your router. Check for firmware updates, as these often address connectivity bugs. Freebox Delta users have noted occasional disconnections; a stable internet connection is crucial for optimal performance.
Incorrect Temperature Readings
Are you noticing inaccurate temperature readings from your Delta Controls thermostat? Begin by verifying the thermostat’s location isn’t affected by direct sunlight, drafts, or heat-generating appliances. Consider calibration options within the advanced settings to fine-tune the temperature sensor.
Ensure proper airflow around the unit. If issues continue, check for obstructions blocking the sensor. Some users have reported sound variations impacting system performance, potentially influencing temperature regulation. A firmware update might resolve sensor-related inaccuracies.

Advanced Settings and Customization
Explore Delta Controls’ customization options! Adjust swing/differential settings, calibrate temperature sensors, and configure system-specific parameters for personalized comfort and optimal HVAC performance.
Calibration Options for Temperature Sensors
Ensuring accurate temperature readings is crucial for optimal comfort and energy efficiency. Delta Controls thermostats offer calibration features allowing users to fine-tune sensor accuracy. If discrepancies exist between the thermostat’s reading and a trusted external thermometer, calibration adjustments can be made.
This process typically involves comparing readings and inputting an offset value to correct the thermostat’s display. Refer to the thermostat’s interface for specific calibration steps, often found within the advanced settings menu. Regular calibration maintains system precision, preventing unnecessary heating or cooling cycles and maximizing savings.
Adjusting Swing/Differential Settings
The swing, or differential setting, controls the temperature range before the thermostat activates heating or cooling. A smaller swing results in more frequent, shorter cycles, maintaining a consistent temperature but potentially increasing wear. Conversely, a larger swing leads to less frequent, longer cycles, saving energy but allowing for greater temperature fluctuations.
Delta Controls thermostats allow users to adjust this setting to balance comfort and efficiency. Access this option within the advanced settings menu and experiment to find the optimal value for your home and preferences. Consider factors like insulation and climate.
Configuring System-Specific Parameters
Delta Controls thermostats offer customization for diverse HVAC systems. Within advanced settings, users can configure parameters like heat pump type, auxiliary heat settings, and minimum run times. These adjustments optimize performance and efficiency based on your specific setup.
Proper configuration is crucial for reliable operation. Incorrect settings can lead to inefficient heating/cooling or system malfunctions. Refer to your HVAC system’s documentation and the Delta Controls manual for guidance. Consider professional assistance if unsure about these advanced configurations.

Maintenance and Care
Regular cleaning of the display and timely software updates ensure optimal performance. Battery replacement, if applicable, and addressing connectivity issues reported by users are key.
Cleaning the Thermostat Display
To maintain a clear and responsive touchscreen, regular cleaning is essential. Always power off the thermostat before cleaning to prevent accidental inputs or damage. Use a soft, dry, lint-free cloth to gently wipe the display surface. Avoid using abrasive cleaners, solvents, or excessive moisture, as these can scratch or damage the screen.
For stubborn smudges, lightly dampen the cloth with distilled water and wring it out thoroughly. Ensure no water enters the thermostat’s internal components. Gently wipe the display, and then dry it immediately with a clean, dry cloth. Consistent cleaning will ensure optimal visibility and touchscreen functionality, contributing to a positive user experience, especially given reported connectivity and operational concerns with the Delta system.
Battery Replacement (if applicable)
Certain Delta Controls thermostat models may utilize batteries as a backup power source or for specific functionalities. If your model requires batteries, a low battery indicator will appear on the display. Consult the thermostat’s specific model documentation to identify the correct battery type and quantity needed.
To replace the batteries, power off the thermostat. Locate the battery compartment, typically on the back or side of the unit, and carefully open it. Remove the old batteries and insert new ones, ensuring correct polarity (+ and -). Close the compartment securely. Given reported connectivity issues with the Delta system, proper battery maintenance is crucial for uninterrupted operation.
Software Updates and Firmware Management
Delta Controls regularly releases software and firmware updates to improve thermostat performance, add new features, and address potential security vulnerabilities. These updates are crucial for maintaining optimal system functionality, especially given user reports of intermittent disconnections and sound problems with the Freebox Delta.
Check for updates through the thermostat’s menu or the mobile app (iOS and Android). Ensure a stable Wi-Fi connection during the update process. Avoid interrupting the update, as this could damage the thermostat’s firmware. Following updates, verify proper operation and re-establish smart home integrations if necessary.

Safety Information and Warnings
Always prioritize electrical safety when installing or servicing the thermostat. Observe operating temperature limits and consult the warranty for support, addressing potential disconnections promptly.
Electrical Safety Precautions
Prior to installation or maintenance, always disconnect power at the breaker to prevent electrical shock. Improper wiring can lead to system malfunction or create a fire hazard; consult a qualified electrician if unsure. Ensure all connections are secure and comply with local electrical codes.
Do not expose the thermostat to water or excessive moisture. Regularly inspect wiring for damage, replacing frayed or worn components immediately. Avoid touching exposed wires or terminals.
Report any unusual smells or sparking immediately and discontinue use. Remember, user reports mention occasional disconnections, potentially indicating electrical instability – address these promptly for safety.
Operating Temperature Limits
The Delta Controls thermostat is designed for indoor use within a typical ambient temperature range of 32°F to 104°F (0°C to 40°C). Avoid installing the thermostat in direct sunlight, near heat sources, or in areas with poor ventilation, as this can affect accuracy.
Exposure to temperatures outside the specified range may cause inaccurate readings or damage the device.
User reports of sound issues and disconnections suggest potential sensitivity to environmental factors; maintaining optimal temperature conditions is crucial for reliable performance. Do not operate in excessively humid environments.
Warranty Information and Support Contact
Delta Controls offers a standard one-year limited warranty covering defects in materials and workmanship from the date of purchase. This warranty does not cover damage due to misuse, improper installation, or environmental factors.
For warranty claims and technical support, please visit the official Delta Controls website or contact their customer service team.
Users experiencing connectivity issues or sound problems, as reported with Freebox Delta, should consult the support documentation or reach out for assistance.