
Back to the Roots Mushroom Kit Instructions: A Comprehensive Guide
Embark on a rewarding journey with our kit! This guide details cultivating mushrooms at home, offering a simple, sustainable experience for beginners and enthusiasts alike.
Understanding Your Mushroom Kit
Welcome to the fascinating world of mushroom cultivation! Your Back to the Roots Mushroom Kit is a self-contained ecosystem designed to bring the magic of fungi directly to your home. This isn’t just about growing food; it’s about understanding a vital part of nature’s cycle and enjoying fresh, delicious mushrooms.
This kit utilizes a pre-inoculated substrate, meaning the growing medium (the block) already contains mushroom spores. These spores are ready to germinate and begin the fruiting process with the right conditions. Understanding this pre-inoculation is key – you’re not planting seeds, but rather providing an environment for existing spores to thrive.
Success relies on mimicking the natural habitat of these mushrooms, focusing on moisture, temperature, and indirect light.
What’s Included in the Kit?
Your Back to the Roots Mushroom Kit arrives with everything you need to begin your growing adventure! Inside, you’ll find the pre-inoculated mushroom block, the heart of the kit, ready to produce a bountiful harvest. A specially designed grow bag creates the ideal humid environment for fruiting, maintaining moisture levels crucial for mushroom development.
We’ve also included a convenient spray bottle to help you maintain optimal humidity. This is essential for encouraging pinhead formation and healthy mushroom growth. Detailed instructions, like this guide, are provided to walk you through each step of the process, ensuring a successful and rewarding experience.
No additional materials are required to start – it’s truly an all-in-one solution!
Kit Components Breakdown
Let’s take a closer look at each component of your Back to the Roots Mushroom Kit. The mushroom block is a substrate, typically made of sterilized grain and supplemented with nutrients, inoculated with mushroom spores. This is where the magic happens! The grow bag, often made of a breathable poly material, maintains humidity and provides a controlled environment.
The spray bottle is vital for misting, replicating natural rainfall and keeping the substrate moist. These components work synergistically to mimic the mushroom’s natural habitat. Understanding each part’s role will empower you to optimize growth and enjoy a plentiful harvest. Proper care of each element is key to success!
The Mushroom Block
The heart of your kit is the mushroom block, a carefully prepared substrate. It’s typically composed of sterilized grain – often rye or wheat – enriched with nutrients like wood chips or sawdust. This provides the necessary food source for the mushroom mycelium to thrive. The block is inoculated with mushroom spores, initiating the colonization process.
Handle the block gently, avoiding punctures or damage. Maintaining its integrity is crucial for successful fruiting. You’ll notice a white, fuzzy growth – this is the mycelium, the vegetative part of the mushroom. It’s a sign of healthy colonization and a promising future harvest. Keep it moist, but not soaking wet!
The Grow Bag
The grow bag creates a humid microclimate essential for mushroom development. Typically made of a breathable, food-grade plastic, it retains moisture while allowing for crucial air exchange. This prevents the block from drying out, a common cause of failed harvests. The bag also protects the developing mushrooms from contaminants and pests.
You’ll notice small holes or slits in the bag – these are intentional! They facilitate airflow and allow the mushrooms to “breathe.” Avoid completely sealing the bag, as this can lead to suffocation and mold growth. Maintaining proper humidity within the bag is key to a bountiful yield.
The Spray Bottle
The included spray bottle is vital for maintaining optimal humidity levels around the mushroom block. Mushrooms thrive in a moist environment, and regular misting replicates their natural habitat. Use only clean, filtered water to avoid introducing contaminants that could hinder growth or cause mold.
Misting isn’t about soaking the block; it’s about creating a humid atmosphere. Aim for a fine mist, lightly coating the inside of the grow bag and the surface of the block. Avoid spraying directly onto developing pins, as this can damage them. Consistent, gentle misting is the key to successful fruiting.
Preparing for Growth: Initial Setup
Unboxing your kit marks the exciting start to mushroom cultivation! Begin by carefully opening the box and familiarizing yourself with all components. Gently remove the grow bag, ensuring not to puncture it. Locate a suitable location – a cool, dark space with indirect light is ideal. Avoid direct sunlight and drafts, as these can dry out the block.
Next, carefully cut open the bag containing the mushroom block, being cautious not to contaminate it. Place the block inside the grow bag, creating a humid microclimate. Finally, prepare your spray bottle with clean water; you’re now ready to begin the fruiting process!
Choosing the Right Location
Selecting the perfect spot is crucial for successful mushroom growth. Prioritize a location that maintains consistent temperatures between 60-75°F (15-24°C). Basements, kitchens, or even a closet can work well, provided they aren’t prone to extreme temperature fluctuations. Avoid direct sunlight, which can overheat and dry out the mushroom block.
Humidity is also key; aim for around 80-90%. A naturally humid room is best, but if needed, you can increase humidity by placing a tray of water nearby. Ensure good air circulation without creating drafts. A stable, slightly humid, and dimly lit area will yield the best results!
Maintaining Optimal Temperature & Humidity
Consistent conditions are vital for a bountiful harvest. Monitor the temperature daily, aiming for 60-75°F (15-24°C). Fluctuations can stress the mycelium and hinder fruiting. Humidity levels should remain between 80-90%; use a hygrometer for accurate readings.
Maintain humidity by misting the grow bag 2-3 times daily with the provided spray bottle, ensuring even coverage without oversaturating. Avoid direct spraying onto the mushroom block itself. Proper ventilation is also important – a small amount of airflow prevents stagnant air and mold growth. Regular monitoring ensures a thriving environment!
The Fruiting Process: Step-by-Step
Witness the magic unfold! After the initial colonization phase, tiny mushroom pins will emerge – these are the beginnings of your harvest. Maintain consistent misting and humidity levels to encourage pin development. Avoid disturbing the block during this delicate stage.
Over the next few days, pins will rapidly grow into mature mushrooms. Continue misting 2-3 times daily, focusing on the grow bag’s interior. Ensure adequate ventilation to prevent moisture buildup. Patience is key; the fruiting process takes time, but the reward of fresh, homegrown mushrooms is well worth the wait!
Misting Schedule & Technique
Hydration is crucial for fruiting! Mist your mushroom kit 2-3 times daily using the provided spray bottle. Aim for a fine mist, saturating the grow bag’s interior walls, but avoid directly spraying the developing pins or mushrooms – this can cause bruising or damage.
Maintain high humidity within the bag; condensation should form on the plastic. If the block appears dry, increase misting frequency. Conversely, if excessive water pools, reduce misting or briefly open the bag for ventilation. Consistent moisture is key to a bountiful harvest!
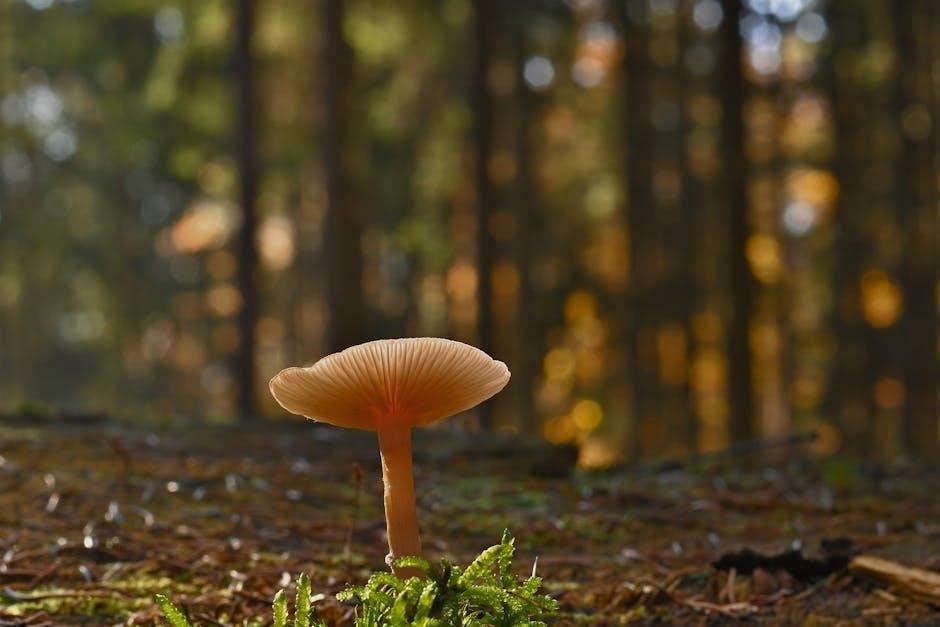
Pinning: What to Expect
Pinning marks the exciting beginning of mushroom formation! After the initial colonization phase, tiny mushroom “pins” – small, pearl-like bumps – will emerge from the mushroom block. This typically occurs 7-14 days after setup, but can vary based on environmental conditions.
Don’t be alarmed by the initial appearance; pins will rapidly grow into mature mushrooms. Maintain consistent misting and humidity during this stage. Avoid disturbing the block, as this can hinder pin development. Patience is key – soon you’ll have a beautiful cluster of mushrooms!
Harvesting Your Mushrooms
Reaping the rewards of your patience! Harvesting occurs when the mushroom caps have fully opened, but before they release spores – indicated by a powdery dusting. Gently grasp the mushroom near its base and twist, then pull. Avoid cutting, as this can leave behind remnants that may contaminate the block.
Harvest all mature mushrooms at once to encourage a second flush. Inspect the block for any remaining pins and allow them to continue developing. Proper harvesting ensures a bountiful yield and maintains the health of your mushroom kit for subsequent fruiting cycles.
Identifying Optimal Harvest Time
Knowing when to pick is crucial! Optimal harvest time arrives when the veil, the membrane connecting the cap to the stem, begins to break or has fully broken. The cap should be fully expanded, though not yet completely flat, displaying a vibrant color.
Avoid harvesting too early, as the mushrooms won’t fully develop their flavor. Delaying harvest past spore release results in diminished quality and potential contamination. Regularly inspect your grow bag, observing cap development to determine the perfect moment for a delicious harvest.
Proper Harvesting Techniques
Gentle handling is key! To harvest, grasp the mushroom firmly near the base of the stem. Gently twist and pull upwards, aiming to remove the entire mushroom cluster cleanly from the block; Avoid using knives or scissors, as these can damage the mycelium and potentially introduce contamination.
If a mushroom resists, carefully wiggle it while continuing to twist. Inspect the harvested area for any remaining stem fragments and remove them to prevent rot. Proper harvesting encourages continued fruiting and maximizes your yield.
Troubleshooting Common Issues
Facing challenges? Don’t worry! Common issues include contamination – look for green, black, or fuzzy molds, indicating a problem. Discard the block if heavily contaminated. Slow or no growth can stem from insufficient humidity, low temperatures, or a poorly ventilated space.
Ensure consistent misting and maintain optimal temperature. If pinning occurs but growth stalls, increase humidity. Remember, patience is vital! Minor imperfections are normal. Addressing issues promptly maximizes your chances of a successful harvest. A healthy kit yields delicious mushrooms!
Contamination Prevention & Identification
Maintaining a sterile environment is key! Contamination appears as mold – often green, black, or fuzzy – on the mushroom block. Prevention starts with clean hands and a sanitized workspace. Avoid touching the substrate directly. Ensure adequate air circulation to discourage mold growth.
If you spot contamination, isolate the kit immediately to prevent spread. Minor spots can sometimes be carefully removed, but significant contamination necessitates disposal. Early detection is crucial. A healthy kit will exhibit white mycelium, not colorful molds. Prioritize cleanliness throughout the process!
Slow or No Growth – Causes & Solutions
Patience is vital, but stagnation signals a problem! Slow growth often stems from suboptimal temperature or humidity. Ensure the kit remains within the ideal range – typically 60-70°F with high humidity. Insufficient light can also hinder development. Check for proper misting; the substrate should be consistently moist, not soggy.
If growth remains stalled, gently check for dryness within the block. Rehydrate if needed. Avoid overwatering, which can lead to rot. If contamination is absent and conditions are optimal, allow more time – sometimes, kits are simply slow starters!
Extending the Harvest: Second Flush
Don’t discard your block after the first harvest! A second flush is often possible, yielding another crop of delicious mushrooms. After harvesting, fully submerge the mushroom block in cool, clean water for 12-24 hours. This rehydrates the substrate, encouraging new growth.
Return the block to the grow bag, maintaining optimal temperature and humidity levels. Resume the misting schedule. Pinning may take longer for the second flush, so be patient. Consistent care increases your chances of a successful second harvest, maximizing your kit’s potential!
Preparing for a Second Fruiting Cycle
Rehydration is key to a successful second flush. After the initial harvest, gently remove any remaining mushroom stems. Fully immerse the mushroom block in cool, filtered water for approximately 12 to 24 hours – a “dunking” process. This replenishes the moisture lost during the first fruiting.
Drain excess water and return the block to its grow bag. Re-establish the ideal environmental conditions: consistent humidity and a suitable temperature. Resume regular misting. Patience is crucial, as the second flush may require a slightly longer incubation period before pinning begins.
Post-Harvest Care & Kit Disposal
Extend the life of your kit responsibly! After your final harvest, the spent mushroom block isn’t waste – it’s valuable compost. The substrate is rich in nutrients, making it excellent for enriching garden soil or potted plants. Break up the block and mix it thoroughly with existing soil.
Avoid using the block for plants intended for direct consumption until fully composted. The grow bag and spray bottle can be recycled, depending on your local facilities. Properly disposing of materials minimizes environmental impact, completing the sustainable cycle of your mushroom growing adventure.
Composting the Used Block
Transform spent substrate into garden gold! Once harvesting is complete, break apart the mushroom block. This increases surface area for faster decomposition. Mix the crumbled block thoroughly with existing garden soil or add it to your compost bin. The substrate is a fantastic source of nutrients, enriching the soil for future plants.
Ensure proper aeration within the compost pile for optimal breakdown. Avoid direct application to edible plants until fully composted to prevent any potential issues. This eco-friendly practice closes the loop, returning valuable resources to the earth.

Frequently Asked Questions (FAQ)
Q: What if I don’t see pins forming? Ensure consistent humidity and optimal temperature. Patience is key – sometimes it takes time! Q: My block looks green; is that mold? A slight greenish tinge is normal, but fuzzy, colorful mold indicates contamination. Discard the block. Q: Can I reuse the grow bag? No, the bag is designed for single use to maintain a sterile environment.
Q: How long will my kit produce mushrooms? Typically, several flushes are possible with proper care. Q: What kind of mushrooms will I grow? This depends on the kit purchased – oyster, shiitake, or lion’s mane are common varieties.
Resources & Further Learning
Expand your mycology knowledge! Back to the Roots offers a vibrant online community forum for sharing experiences and troubleshooting: [link to forum]. Explore detailed guides on mushroom cultivation at [link to mycology website].

Delve into the science of fungi with books like “Mycelium Running” by Paul Stamets, a comprehensive resource for understanding mushroom properties and uses. Consider joining a local mycological society for workshops and forays. Numerous YouTube channels demonstrate cultivation techniques; search for “mushroom growing tutorials”.