CEN-TECH Digital Multimeter Manual (Español Focus)
This manual provides essential guidance for operating the CEN-TECH multimeter, specifically tailored for Spanish-speaking users; It ensures safe and accurate electrical measurements․
The CEN-TECH Digital Multimeter, such as the popular 59410 AC-DC 600V CAT III model, is a versatile tool for electrical testing and troubleshooting․ This multimeter offers a range of functions, including measuring DC and AC voltage, continuity, and resistance․ It’s a common choice for both hobbyists and professionals due to its affordability and functionality․
This manual, with a specific focus on Spanish-speaking users, aims to bridge the language gap often encountered with technical documentation; Understanding the proper operation and safety precautions is crucial when working with electricity․ Resources like Harbor Freight’s support and online communities can further assist users․ This guide will help you maximize the multimeter’s capabilities while prioritizing safety․
Target Audience: Spanish-Speaking Users
This section is specifically designed for individuals whose primary language is Spanish and who are utilizing a CEN-TECH digital multimeter․ Recognizing the importance of accessible information, this manual provides translated explanations of key functions, safety procedures, and operating instructions․
We understand that technical manuals can be challenging to navigate in a second language․ Therefore, we’ve prioritized clear and concise language, avoiding overly complex terminology․ This resource aims to empower Spanish-speaking users to confidently and safely perform electrical measurements․ Accessing the official Spanish manual online, alongside Harbor Freight’s support, further enhances the user experience and ensures comprehension․
Importance of a Manual in Spanish
Providing a Spanish-language manual for the CEN-TECH digital multimeter is crucial for safety and effective use․ Many technicians and DIY enthusiasts are more comfortable and accurate when instructions are in their native language, minimizing the risk of misinterpretation and potential electrical hazards․
A translated manual ensures all users, regardless of their English proficiency, can fully understand the multimeter’s functions, safety precautions, and troubleshooting steps․ This inclusivity promotes safe working practices and maximizes the tool’s utility․ Access to resources in Spanish fosters confidence and reduces errors, ultimately leading to more reliable electrical work and preventing accidents․

Safety First!
Prioritize personal safety when using the CEN-TECH multimeter; always follow the translated safety guidelines to prevent electrical shock and ensure accurate readings;
Important Safety Information (Translated)
Always disconnect test leads before changing batteries or fuses․ Avoid working in damp or wet locations to minimize shock risk․ Inspect leads for damage before each use; replace if compromised․ Never exceed the multimeter’s CAT III 600V rating․
Be cautious when working with voltages above 60V DC or 30V AC, as these pose a significant shock hazard․ Do not attempt to measure voltages on ungrounded circuits․ Ensure proper grounding techniques are employed․ Never open the multimeter’s casing while powered․
Always wear appropriate personal protective equipment (PPE), including safety glasses․ Read and understand all instructions before operation․ Misuse can lead to injury or damage․ Keep the multimeter away from children․
CAT III 600V Rating Explained
The CAT III 600V rating signifies the multimeter is designed for use in fixed installations, such as distribution panels, and in some industrial locations․ It can safely measure voltages up to 600V AC/DC within this category․ This rating doesn’t imply immunity to higher voltages; it defines the transient overvoltage protection level․
CAT III equipment is tested to withstand 7500V peak impulse voltage․ Understanding this rating is crucial for safe operation․ Using a multimeter with an insufficient CAT rating in a higher-category environment is dangerous․ Always verify the environment’s CAT rating before measurement․
Ensure the multimeter’s test leads are also CAT III rated․ Never exceed the 600V limit, even if the environment is CAT III․ Proper use within the specified rating ensures operator safety and instrument integrity․
General Precautions for Electrical Testing
Always inspect test leads for damage before use; cracked insulation or exposed metal presents a shock hazard․ Never work alone and ensure a clear, dry workspace․ Disconnect power to the circuit being tested whenever possible, and always assume circuits are live․ Use appropriate personal protective equipment (PPE), including safety glasses and insulated gloves․
Avoid touching exposed metal parts of test probes while taking measurements․ Be cautious when working with high voltages; even low current can be lethal․ Never operate the multimeter in wet or damp conditions․ Double-check the multimeter’s settings before connecting it to a circuit․
If unsure about any aspect of electrical testing, consult a qualified electrician․ Respect electricity and prioritize safety at all times․

Understanding the Multimeter
Familiarize yourself with the CEN-TECH multimeter’s core functions, display, and input jacks for safe and effective electrical measurements, especially when using the Spanish manual․
Overview of Functions (DC Voltage, AC Voltage, Continuity, Resistance, etc․)
The CEN-TECH multimeter offers a versatile range of measurement capabilities, crucial for various electrical tasks․ DC Voltage measures direct current, like batteries․ AC Voltage measures alternating current, common in household outlets․ Continuity testing verifies a complete electrical path, useful for checking wires and fuses․
Resistance measurement determines the opposition to current flow in a circuit․ Some models include additional functions like Diode testing, checking diode functionality, and Transistor hFE testing, evaluating transistor gain․ Capacitance measurement, if available, assesses a capacitor’s ability to store charge․
Understanding these functions, as detailed in the Spanish manual, is vital for accurate readings and safe operation; Proper selection of the function and range ensures reliable results for any electrical project․
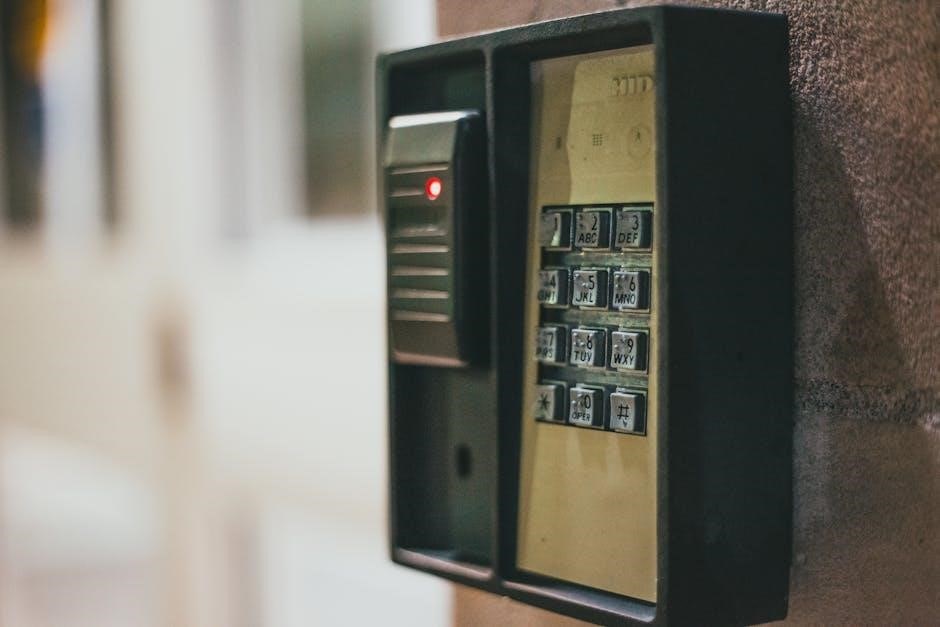
Display and Button Layout
The CEN-TECH multimeter features a clear, easy-to-read digital display, presenting measurement values with precision․ Key buttons control the device’s functions: a power switch activates/deactivates the multimeter, and a rotary dial selects the desired measurement type (voltage, resistance, continuity, etc․)․
Dedicated buttons often manage additional features like range selection, data hold (freezing the display), and backlight illumination for improved visibility․ The display typically shows the measurement value, units (Volts, Ohms, Amps), and indicators for battery level or function selection․
The Spanish manual provides a labeled diagram illustrating each button and display element, aiding Spanish-speaking users in quickly familiarizing themselves with the multimeter’s interface and controls․
Input Jacks and Their Uses
The CEN-TECH multimeter utilizes several input jacks, each designated for specific measurement purposes․ A “COM” (Common) jack serves as the reference point for all measurements, connecting the black test lead․ The “VΩmA” jack is used for voltage, resistance, and low-current (milliamps) measurements, accommodating the red test lead․
A separate jack, often labeled “10A” or “20A”, is dedicated to high-current (Amps) measurements, requiring the red lead to be plugged into this jack․ Incorrect jack usage can damage the multimeter or yield inaccurate readings․
The Spanish manual clearly illustrates each jack with corresponding symbols and explains its specific function in Spanish, ensuring users understand proper connection procedures for safe and accurate testing․

Operating Instructions
Follow these steps for accurate measurements․ Select the desired function, connect the test leads correctly, and read the display in Spanish or English․
Measuring DC Voltage
To measure DC voltage, begin by turning the rotary switch to the appropriate DC voltage range․ Ensure the range selected is higher than the expected voltage to prevent damage․ Insert the black test lead into the COM jack and the red test lead into the VΩmA jack․ Carefully connect the test leads across the circuit or component you wish to measure, observing correct polarity – red to positive, black to negative․
The multimeter will display the DC voltage reading․ If the reading is negative, it indicates reversed polarity․ If the display shows “OL” or “1”, it means the voltage is exceeding the selected range; switch to a higher range․ Always exercise caution when working with DC voltage, as even low voltages can be hazardous․ Refer to the Spanish translation within the manual for specific terminology and safety instructions․
Measuring AC Voltage
To measure AC voltage, rotate the selector switch to the desired AC voltage (V~) range․ As with DC voltage, select a range higher than the anticipated voltage․ Connect the black test lead to the COM port and the red test lead to the VΩmA port․ Carefully touch the probes to the points in the circuit where you want to measure the AC voltage – polarity doesn’t matter for AC․
The multimeter’s display will show the AC voltage reading․ An “OL” or “1” display indicates the selected range is insufficient; move to a higher setting․ Remember to prioritize safety when measuring AC voltage, as it can be dangerous․ The Spanish version of this manual provides translated instructions and crucial safety warnings for Spanish-speaking users․
Continuity Testing Explained
Continuity testing verifies if a complete electrical path exists between two points․ Rotate the selector switch to the continuity setting (often symbolized by a diode or sound wave)․ Connect the black lead to COM and the red lead to VΩmA․ Touch the probe tips to the points you’re testing․
If a complete circuit exists, the multimeter will beep and display a low resistance value (close to 0 ohms)․ An open circuit will show “OL” or a high resistance․ This function is useful for checking wires, fuses, and switch connections․ The Spanish manual emphasizes safety precautions during testing․ Understanding the audible beep and visual display is crucial for Spanish-speaking technicians․
Resistance Measurement Guide
Measuring resistance determines how much a component opposes the flow of electrical current․ Select the resistance (Ω) setting on the multimeter’s dial․ Ensure the circuit is de-energized – never measure resistance in a live circuit! Connect the black lead to the COM jack and the red lead to the VΩmA jack․
Touch the probe tips to the component’s terminals․ The display will show the resistance value in ohms․ The Spanish-language manual stresses the importance of disconnecting power․ Higher values indicate greater resistance․ Always start with the highest range and decrease it for better accuracy․ Understanding the Ω symbol and reading the display are key skills for Spanish-speaking users․

Advanced Features
Explore diode testing and transistor hFE functions (if equipped)․ The Spanish manual details these features, enhancing diagnostic capabilities for skilled users․
Diode Test Function
The diode test function assesses the functionality of diodes by measuring forward voltage drop․ A healthy diode should exhibit a forward voltage drop typically between 0․5V and 0․8V, as detailed in the CEN-TECH manual․ An open diode will display “OL” (Over Limit), indicating no continuity, while a shorted diode will show near-zero resistance․
To perform this test, select the diode symbol on the multimeter․ Connect the red probe to the anode (positive side) and the black probe to the cathode (negative side) of the diode․ The Spanish-language manual provides clear diagrams illustrating proper probe placement․ Remember to disconnect power from the circuit before testing diodes in a live circuit․ This feature is crucial for identifying faulty diodes within electronic devices, aiding in efficient troubleshooting and repair․
Transistor hFE Test (if applicable)
The hFE test, if your CEN-TECH multimeter model includes it, measures the DC current gain of bipolar junction transistors (BJTs)․ This test helps determine if a transistor is functioning correctly by assessing its amplification capability․ The Spanish-translated manual will illustrate the correct pin configuration – base, collector, and emitter – for various transistor types (NPN and PNP)․
Select the hFE symbol on the multimeter․ Insert the transistor leads into the designated test sockets, ensuring correct orientation․ The display will show the hFE value; a typical range is between 100 and 300․ Values significantly outside this range suggest a faulty transistor․ Always consult the transistor’s datasheet for its specific hFE specifications․ This test is invaluable for electronics repair and component verification․
Capacitance Measurement (if applicable)
If your CEN-TECH multimeter features a capacitance measurement function, it allows you to determine the ability of a capacitor to store an electrical charge․ The Spanish manual will clearly depict the correct procedure for this test, emphasizing safety precautions․ Begin by selecting the capacitance (often marked with ‘F’) symbol on the dial․
Disconnect the capacitor from any circuit before testing․ Insert the capacitor leads into the designated input jacks, observing polarity if it’s an electrolytic capacitor․ The display will show the capacitance value in Farads (F), microfarads (µF), or picofarads (pF)․ A reading of ‘OL’ or zero indicates a faulty capacitor․ This function is crucial for verifying capacitor health in electronic devices․

Technical Specifications
This section details the CEN-TECH multimeter’s performance characteristics, including accuracy, input impedance, and power supply details, vital for informed use․
Accuracy Specifications
Understanding the accuracy of your CEN-TECH multimeter is crucial for reliable measurements․ Accuracy is typically expressed as ±(a percentage of the reading + a number of digits)․ For DC Voltage, accuracy might be ±(0․5% + 2 digits), meaning the reading could be off by 0․5% of the measured value plus 2 counts of the least significant digit․
AC Voltage accuracy is often similar, but may vary depending on the frequency․ Resistance measurements also have a specified accuracy, often around ±(1% + 2 digits)․ These specifications are generally at room temperature (23°C ± 5°C)․ It’s important to note that accuracy decreases as you move further away from the specified operating conditions․ Refer to the full specifications table within the manual for detailed accuracy values across all ranges and functions, ensuring precise and dependable results․
Input Impedance
Input impedance is a critical specification, particularly when measuring voltage․ It represents the resistance the multimeter presents to the circuit being tested․ A higher input impedance minimizes the loading effect on the circuit, ensuring a more accurate voltage reading․
The CEN-TECH multimeter typically has an input impedance of 10 MΩ (Megaohms) for DC voltage measurements․ For AC voltage, it may be lower, often around 10 MΩ in parallel with a capacitance․ This high impedance prevents significant current draw from the circuit, preserving the original voltage level․ Lower impedance multimeters can alter the circuit’s behavior, leading to inaccurate readings․ Understanding input impedance is vital for proper measurement technique and interpreting results correctly․
Power Supply Details
The CEN-TECH digital multimeter operates on a 9V battery, typically a standard alkaline or carbon-zinc battery․ Battery life varies depending on usage and features employed, such as backlight illumination․ The manual emphasizes the importance of using a fresh, high-quality battery for optimal performance and accurate readings․
Low battery voltage is indicated by a symbol on the display․ When this symbol appears, the battery should be replaced promptly to avoid measurement errors․ Do not mix old and new batteries, or different battery types․ Always observe the correct polarity when installing a new battery․ Proper battery maintenance ensures reliable operation of your multimeter and prolongs its lifespan․

Troubleshooting
This section offers solutions to common issues, including inaccurate readings, display problems, and fuse replacement procedures․ Refer to this guide for quick fixes!
Common Issues and Solutions
Issue: No display or incorrect readings․ Solution: Check battery condition and replace if necessary․ Ensure proper connection of test leads to the correct input jacks․ Verify the selected function and range match the measurement being taken․
Issue: Overload indication․ Solution: Reduce the range setting or switch to a higher voltage/current input jack․ Avoid exceeding the multimeter’s maximum input limits․
Issue: Continuity test fails to beep․ Solution: Confirm the circuit is actually complete․ Check for damaged test leads or poor connections․ Ensure the continuity function is selected․
Issue: Fuse blown․ Solution: Replace the fuse with the correct amperage and voltage rating (refer to the ‘Fuse Replacement Instructions’ section)․ Investigate the cause of the overload to prevent recurrence․
Remember: Always prioritize safety and disconnect power before troubleshooting electrical circuits․
Fuse Replacement Instructions
Caution: Always disconnect test leads and power source before replacing the fuse․ Using an incorrect fuse can damage the multimeter and pose a safety hazard․
Step 1: Locate the fuse compartment, typically on the back of the multimeter․ Step 2: Remove the compartment cover using a small screwdriver․ Step 3: Identify the blown fuse – it will have a broken filament․
Step 4: Replace the blown fuse with an identical fuse of the same amperage and voltage rating․ Important: Refer to the ‘Technical Specifications’ section for the correct fuse type․
Step 5: Reinstall the fuse compartment cover securely․ Step 6: Test the multimeter to ensure proper operation․ If the fuse blows again, there’s an underlying issue requiring further investigation․
Battery Replacement Guide
Important: Before replacing the battery, disconnect all test leads from the multimeter to prevent accidental shorts․ This guide details how to replace the batteries powering your CEN-TECH digital multimeter, ensuring continued accurate operation․
Step 1: Locate the battery compartment, usually on the back of the unit․ Step 2: Remove the compartment cover, often secured with a small Phillips-head screwdriver․ Step 3: Note the battery polarity (+ and -) before removal․
Step 4: Replace the old batteries with new ones of the same type (typically AAA or 9V)․ Ensure correct polarity during installation․ Step 5: Securely reattach the battery compartment cover․
Step 6: Test the multimeter to confirm proper functionality․ Dispose of used batteries responsibly, following local regulations․

Resources & Support
For additional assistance, explore the official Harbor Freight website for the Spanish manual and contact their support team․ Online forums also offer help․
Finding the Official Spanish Manual Online
Locating the official Spanish version of the CEN-TECH digital multimeter manual is crucial for comprehensive understanding and safe operation․ Begin your search on the Harbor Freight Tools website, navigating to the support section and specifically searching for the model number (e․g․, 59410)․
Many users have successfully found downloadable PDF versions of the manual through online searches, utilizing keywords like “CEN-TECH multimeter manual español” or “manual digital CEN-TECH español․” Be cautious when downloading from third-party sites, ensuring the source is reputable to avoid malware․
Furthermore, exploring online communities and forums dedicated to Harbor Freight tools and electronics often yields links to shared manuals and helpful discussions regarding the Spanish translation․ Checking document sharing platforms may also prove fruitful in your search for the official Spanish documentation․
Harbor Freight Support Contact Information
For direct assistance regarding the CEN-TECH digital multimeter, including inquiries about the Spanish manual, contacting Harbor Freight Support is recommended․ You can reach them via telephone at 1-800-444-3353․ Their customer service representatives are available to address questions about product specifications, operation, and manual availability in Spanish․
Alternatively, Harbor Freight offers support through their website, www․harborfreight․com, where you can submit inquiries via their online contact form․ Live chat support may also be available during business hours․ When contacting support, have your multimeter’s model number readily available to expedite the process․
Remember to clearly state your need for the Spanish manual to ensure they provide the correct documentation․
Online Forums and Communities for CEN-TECH Multimeters
Numerous online forums and communities cater to CEN-TECH multimeter users, offering a valuable resource for troubleshooting and sharing knowledge, potentially including Spanish-language support․ Platforms like Reddit (search for “Cen-Tech multimeter”) and dedicated electronics forums often host discussions about these tools․
YouTube channels, such as Maddox Mechanic’s review of the Cen-Tech multimeter, provide visual guides and practical tips․ While primarily in English, comments sections may contain translations or assistance from Spanish-speaking users․ Exploring these communities can uncover user-created guides or translations of the manual․
These forums are excellent places to ask specific questions about the multimeter’s functions or the Spanish manual’s availability․