LiftMaster RSW12UL Manual: Comprehensive Article Plan
This detailed plan outlines a comprehensive guide for the LiftMaster RSW12UL, covering installation, operation, troubleshooting, and essential resources for users.
The LiftMaster RSW12UL is a robust 12VDC swing gate operator designed for both residential and light commercial applications. This operator provides a reliable and secure access solution, combining convenience with safety features. Understanding its capabilities and proper installation procedures is crucial for optimal performance and longevity. This guide will delve into every aspect of the RSW12UL, from its core functionalities and specifications to detailed installation steps and troubleshooting tips.
We’ll explore the operator’s key components, safety mechanisms, and available resources, ensuring you have everything needed for a successful setup and ongoing maintenance. LiftMaster provides a 3-year limited parts warranty, demonstrating their commitment to quality and customer satisfaction. This manual aims to empower users with the knowledge to confidently manage their gate system.
What is the LiftMaster RSW12UL?
The LiftMaster RSW12UL is a 12VDC vehicular swing gate operator specifically engineered for residential and light commercial use. It’s designed to automate swing gates, providing convenient and secure access control. This operator stands out due to its dependable DC motor, ensuring quiet and smooth operation with soft start/stop functionality.
Capable of handling gates up to 600 lbs or 16ft in length, the RSW12UL is suitable for a variety of property types. It’s rated for up to 250 cycles per day, making it ideal for moderate to high-traffic locations. LiftMaster offers comprehensive documentation, including installation manuals in both English and Spanish, alongside detailed wiring diagrams and spec sheets to aid in setup and maintenance.
Key Features and Specifications
The LiftMaster RSW12UL boasts several key features enhancing its functionality and reliability. A powerful 12VDC motor delivers smooth, quiet operation with soft start and stop capabilities. It’s designed for gates weighing up to 600 lbs or spanning 16 feet in length.
The operator supports up to 250 cycles daily, making it suitable for frequent use. Crucially, it includes an emergency disconnect for manual operation, retaining limit positions upon re-engagement. LiftMaster provides a limited parts warranty of 3 years, demonstrating confidence in the product’s durability. Detailed specifications are readily available via data and spec sheets.
Gate Capacity (Weight & Length)
The LiftMaster RSW12UL is specifically engineered for residential and light commercial swing gates. It confidently handles gates weighing up to 600 pounds, providing robust performance for various gate materials and constructions.
Furthermore, the operator accommodates gates with a maximum length of 16 feet. This capacity ensures compatibility with a wide range of property sizes and gate designs. Properly assessing your gate’s weight and length before installation is crucial for optimal operation and longevity of the RSW12UL system. Exceeding these limits can void the warranty and compromise safety.
Motor Type and Performance

The LiftMaster RSW12UL utilizes a powerful 12VDC motor, designed for reliable and efficient operation of swing gates. This DC motor provides smooth, quiet performance, minimizing noise disturbance for homeowners and neighbors.
A key feature is its soft start and soft stop functionality, which reduces stress on the gate and operator components, extending their lifespan. The RSW12UL is capable of handling up to 250 cycles per day, making it suitable for properties with moderate to high gate usage. This robust motor ensures consistent performance even under demanding conditions.
Duty Cycle (Cycles Per Day)
The LiftMaster RSW12UL is engineered to withstand regular use, boasting a duty cycle of up to 250 cycles per day. A “cycle” represents a complete opening and closing operation of the gate. This rating makes the RSW12UL well-suited for residential and light commercial applications where frequent gate access is required.
Exceeding the recommended duty cycle may reduce the operator’s lifespan and potentially void the warranty. Factors like gate weight, length, and environmental conditions can influence the actual duty cycle achieved. Proper maintenance and adherence to the manufacturer’s guidelines are crucial for maximizing performance and longevity.
Safety Features of the RSW12UL
The LiftMaster RSW12UL prioritizes safety with several integrated features designed to prevent accidents and ensure user well-being. A key component is the emergency disconnect, allowing manual gate operation during power outages while preserving pre-set limit positions upon re-engagement.
Furthermore, the RSW12UL is compatible with safety beams (sold separately), which create an invisible barrier that stops and reverses the gate if an obstruction is detected. Obstruction detection systems within the operator itself also contribute to preventing gate closure against obstacles, enhancing overall safety.
Emergency Disconnect Functionality
The RSW12UL’s emergency disconnect is a crucial safety feature, enabling manual operation of the gate when power is unavailable or in emergency situations. This function allows users to easily open or close the gate without relying on electricity, providing continued access;
Importantly, the system is designed to retain the established limit positions even after manual operation and re-engagement. This means the gate will return to its programmed open and close points without requiring recalibration, simplifying the process and ensuring consistent functionality. It’s a straightforward and reliable safety mechanism.
Obstruction Detection Systems
The LiftMaster RSW12UL incorporates advanced obstruction detection systems to enhance safety during gate operation. These systems are designed to prevent the gate from closing on obstacles like vehicles or pedestrians, minimizing potential damage or injury. The operator actively senses obstructions in the gate’s path.

While specific details regarding the obstruction detection technology aren’t explicitly detailed in readily available resources, the operator’s design prioritizes safety through responsive sensing capabilities. This feature is vital for residential and light commercial applications, ensuring a secure and reliable gate operation. Regular testing of these systems is recommended.
Safety Beam Compatibility
The LiftMaster RSW12UL is designed for compatibility with safety beams (photo eyes), a crucial component for enhanced gate safety. These beams create an invisible barrier across the gate opening, and if broken, immediately halt and reverse the gate’s operation. This prevents the gate from closing on obstructions, safeguarding people and property.
While the provided resources don’t detail specific beam models, the RSW12UL’s control system is engineered to integrate seamlessly with standard safety beam setups. Proper alignment and wiring of the safety beams are essential for optimal functionality. Regular testing of the safety beam system is highly recommended to ensure continued reliable operation and safety.
Installation Guide Overview
Proper installation of the LiftMaster RSW12UL is critical for safe and reliable operation. The installation process begins with a thorough pre-installation checklist, ensuring all necessary components are available and the gate is appropriately prepared. This includes verifying gate weight and length compatibility, as the RSW12UL is rated for gates up to 600lbs or 16ft.
Mounting the operator securely is paramount, followed by careful wiring and electrical connections. Detailed wiring diagrams (available as a separate resource) illustrate DC power connections, accessory wiring, and essential grounding procedures. Always adhere to local electrical codes and safety regulations during installation.
Pre-Installation Checklist
Before commencing installation of the LiftMaster RSW12UL, a comprehensive checklist is essential. Verify the gate’s weight does not exceed 600lbs and its length is within the 16ft limit. Confirm adequate clearance around the gate and operator for safe operation and maintenance.
Gather all necessary tools and hardware, including wiring, conduit, and mounting brackets. Review the installation manual and wiring diagram thoroughly. Ensure a stable power supply is available and meets the operator’s voltage requirements (12VDC). Finally, inspect the gate’s structural integrity to ensure it can support the operator’s weight and forces.
Mounting the Operator
Securely mounting the LiftMaster RSW12UL is crucial for reliable performance. Begin by positioning the operator according to the installation manual, ensuring proper alignment with the gate’s swing path. Utilize the provided mounting brackets and hardware, fastening them firmly to a stable surface – typically a gate post or concrete pad.

Double-check bracket alignment before fully tightening the bolts. Verify the operator is level to prevent binding and ensure smooth operation; Pay close attention to clearances, avoiding obstructions that could interfere with the gate’s movement. Proper mounting minimizes vibration and extends the operator’s lifespan.
Wiring and Electrical Connections
Correct wiring is paramount for safe and functional operation of the RSW12UL. Always disconnect power before commencing any electrical work. Refer to the wiring diagram for accurate connections – specifically noting DC power input, accessory wiring (safety beams, keypads), and grounding procedures.
Use appropriately sized wiring to handle the operator’s current draw. Ensure all connections are secure and weatherproofed to prevent corrosion. Proper grounding is essential for safety and to protect the operator from electrical surges. Double-check all connections before restoring power, verifying polarity and tightness.
Understanding the Wiring Diagram
The RSW12UL wiring diagram is crucial for correct installation and operation. It details the connections for DC power, accessories like safety beams and keypads, and essential grounding procedures. Carefully study the diagram before beginning any wiring work, identifying each wire’s function and destination.
Pay close attention to polarity when connecting the DC power source. Incorrect polarity can damage the operator. Accessory wiring requires understanding the trigger signals and voltage requirements. Proper grounding is vital for safety and preventing electrical interference. A clear understanding of the diagram ensures a secure and functional installation.
DC Power Connection
Connecting the 12VDC power source to the RSW12UL requires meticulous attention to detail. Ensure the power supply matches the operator’s voltage requirements. Observe strict polarity – positive to positive and negative to negative – as reversed polarity can cause immediate damage; Use appropriately sized wiring to handle the current draw and minimize voltage drop.
Securely connect the wires using proper connectors, ensuring a tight and reliable connection. Double-check all connections before applying power. A fused connection is highly recommended to protect the operator from power surges. Refer to the wiring diagram for specific terminal locations and connection instructions;
Accessory Wiring
The RSW12UL supports various accessories, enhancing functionality and safety. These include safety beams, keypads, and radio receivers. Wiring these accessories requires careful adherence to the wiring diagram to avoid conflicts or damage. Utilize the designated terminals for each accessory, ensuring correct polarity where applicable.

Employ appropriate wire gauges for accessory connections, considering the distance and current draw. Properly insulate all connections to prevent shorts. Test each accessory individually after wiring to confirm correct operation. Consult the accessory’s manual for specific wiring instructions and compatibility information with the RSW12UL operator.
Grounding Procedures

Proper grounding is crucial for the safe and reliable operation of the LiftMaster RSW12UL. Connect the operator’s grounding terminal to a known, effective earth ground using a minimum 12 AWG wire. This protects against electrical shock and minimizes interference. Ensure the grounding conductor is securely fastened and free from corrosion.
Verify the grounding system’s integrity with a multimeter before energizing the operator. Do not rely on water pipes or gas lines for grounding. A dedicated grounding rod is recommended. Incorrect grounding can lead to malfunction, damage, or safety hazards. Always follow local electrical codes and regulations regarding grounding practices.
Manual Operation and Troubleshooting
The RSW12UL features an emergency disconnect allowing manual gate operation if power fails or during maintenance. Engage the disconnect to disengage the motor, then operate the gate freely. Remember to re-engage the disconnect upon restoring power, maintaining the set limit positions.
Common issues include obstruction detection triggering, slow operation, or complete failure. Check for obstructions in the gate’s path and safety beam alignment. If the operator doesn’t respond, verify power supply and wiring connections. Resetting the operator may resolve minor glitches; consult the manual for specific procedures.
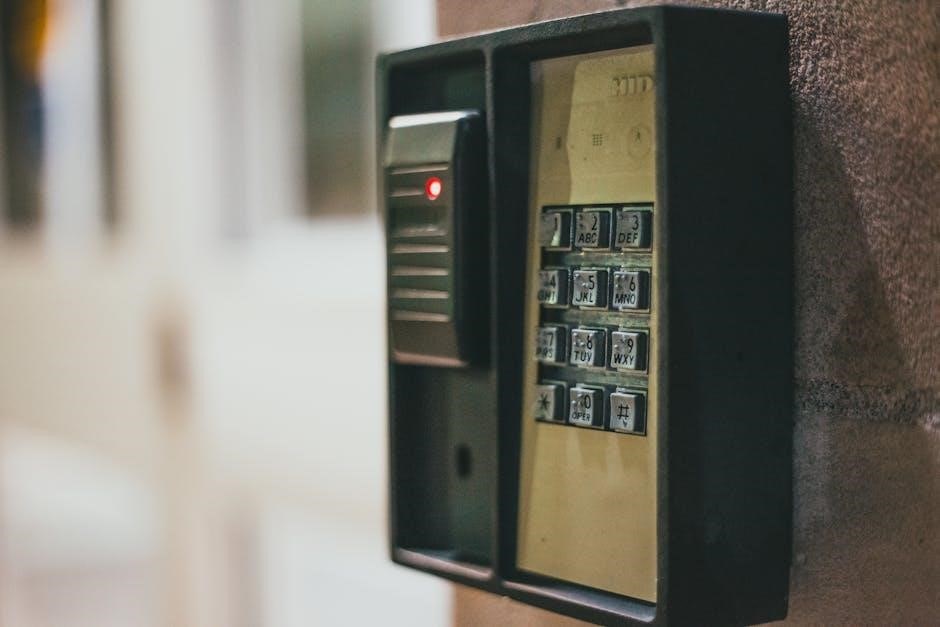
Using the Emergency Disconnect
The emergency disconnect on the LiftMaster RSW12UL is crucial for manual operation during power outages or maintenance. Locate the disconnect mechanism, typically a keyed or looped handle on the operator. Turning the key or pulling the loop will disengage the motor, allowing you to move the gate freely by hand.
Exercise caution when operating the gate manually. Ensure the path is clear of obstructions and people. Upon restoring power, re-engage the disconnect to reconnect the motor. Verify the limit positions are maintained after re-engagement for proper automated function.
Common Issues and Solutions
Gate not responding? First, check the power supply and ensure a stable connection. Obstruction detected? Verify safety beams are clear and aligned; obstructions trigger safety features. Remote control issues? Replace batteries or reprogram the remote to the operator. Slow operation? Inspect hinges and rollers for lubrication and smooth movement.
If the operator reverses unexpectedly, check for obstructions or adjust sensitivity settings. For wiring problems, consult the wiring diagram. Always disconnect power before attempting any repairs. If issues persist, contact LiftMaster support for professional assistance.
Resetting the Operator
To reset the LiftMaster RSW12UL, begin by disconnecting the power supply for at least 30 seconds. This clears the operator’s memory. Reconnect the power and allow the system to initialize. If the issue persists, utilize the emergency disconnect to manually cycle the gate, then re-engage it;
Check limit switch settings; incorrect settings can prevent proper operation. Reprogram remotes if they are not functioning. Consult the manual for specific reset procedures related to safety features or obstruction detection. If a full factory reset is needed, refer to the advanced troubleshooting section of the official documentation.
Warranty Information and Support
LiftMaster provides a limited parts warranty of 3 years for the RSW12UL, protecting against manufacturing defects. This warranty doesn’t cover issues arising from improper installation, misuse, or lack of maintenance. For detailed warranty terms and conditions, consult the official LiftMaster warranty documentation.
Access comprehensive manuals and data sheets directly from the LiftMaster website. Dedicated support is available through their customer service channels, including phone and online resources. Prompt assistance is offered for troubleshooting and resolving any operational concerns related to your RSW12UL gate operator.
LiftMaster Warranty Details (3 Years)
The LiftMaster RSW12UL is backed by a 3-year limited parts warranty, commencing from the original purchase date. This warranty safeguards against defects in materials and workmanship under normal use. It’s crucial to retain proof of purchase for warranty claims.
The warranty excludes damage resulting from improper installation, alterations, accidents, abuse, or natural disasters. Labor costs associated with repairs or replacements aren’t covered. For complete details, including specific exclusions and claim procedures, refer to the official LiftMaster warranty documentation available online or through customer support.
Accessing Manuals and Data Sheets
LiftMaster provides readily available digital resources for the RSW12UL operator. Users can easily download the RSW12UL Manual in both English and Spanish formats directly from the LiftMaster website. Comprehensive spec sheets and detailed data sheets are also accessible, offering in-depth technical specifications.
Furthermore, the RSW12UL Wiring Diagram is available for download, aiding in proper electrical connections. A guide detailing RSW12UL Cover Removal and Installation is also provided. These resources ensure users have the necessary documentation for installation, maintenance, and troubleshooting, promoting a seamless experience.
Contacting LiftMaster Support
For personalized assistance with your LiftMaster RSW12UL, direct contact with LiftMaster support is crucial. While specific contact details aren’t explicitly provided in the readily available resources, the LiftMaster website offers a comprehensive support section. This section typically includes FAQs, troubleshooting guides, and contact forms for submitting inquiries.
LiftMaster Partner Support is also available, potentially offering specialized assistance through authorized dealers and installers. Utilizing these channels ensures access to expert guidance for installation, operation, or any issues encountered with the RSW12UL swing gate operator, maximizing user satisfaction.
Available Resources
A wealth of documentation supports the LiftMaster RSW12UL swing gate operator, ensuring users have access to vital information. Key resources include the RSW12UL Manual in both English and Spanish, providing detailed installation and operational instructions. The RSW12UL Spec Sheet and Data Sheet offer comprehensive technical specifications.
Crucially, the RSW12UL Wiring Diagram is available for electrical connections, and a guide for RSW12UL Cover Removal and Installation aids maintenance. These resources, readily accessible online, empower users and installers to effectively manage and troubleshoot the system, maximizing its lifespan and performance.
RSW12UL Manual (English)
The English RSW12UL Installation Manual is the primary resource for setting up and configuring this residential/light commercial swing gate operator. It provides step-by-step instructions, covering pre-installation checks, mounting procedures, and detailed wiring diagrams. This manual emphasizes safety precautions throughout the installation process, ensuring a secure and functional system.
Furthermore, it details operation, troubleshooting common issues, and understanding the emergency disconnect feature. Accessing this manual is crucial for both professional installers and DIY enthusiasts, guaranteeing proper functionality and adherence to LiftMaster’s guidelines for optimal performance and longevity.
RSW12UL Manual (Spanish)
LiftMaster provides a dedicated RSW12UL Installation Manual in Spanish, catering to a broader user base and ensuring accessibility for those more comfortable with the Spanish language. This manual mirrors the English version in content, offering identical step-by-step guidance for installation, wiring, and operation of the swing gate operator;
It’s a valuable resource for Spanish-speaking installers and homeowners, guaranteeing they can safely and effectively set up and maintain the system. The Spanish manual maintains the same emphasis on safety protocols and troubleshooting, promoting a consistent understanding of the product’s functionality and best practices.
RSW12UL Spec Sheet
The LiftMaster RSW12UL Spec Sheet is a concise document detailing the operator’s key technical specifications. It provides a quick reference for gate professionals and installers, outlining crucial information like maximum gate weight capacity (up to 600 lbs) and length (16ft).
This sheet also specifies the motor type – a powerful 12VDC motor – and the recommended duty cycle of up to 250 cycles per day. Furthermore, it lists important dimensions, weight, and operating temperature ranges, aiding in proper installation planning and ensuring compatibility with existing gate infrastructure.
RSW12UL Data Sheet
The LiftMaster RSW12UL Data Sheet offers a more in-depth technical overview compared to the spec sheet. It expands on the operator’s capabilities, providing detailed electrical specifications like voltage and current draw. This document is crucial for electricians and technicians performing the wiring and electrical connections.
Beyond electrical data, the sheet includes precise mechanical dimensions, mounting hole patterns, and detailed diagrams. It also outlines the operator’s safety certifications and compliance standards. This comprehensive resource ensures installers adhere to safety regulations and achieve optimal performance from the RSW12UL swing gate operator.
RSW12UL Wiring Diagram
The LiftMaster RSW12UL Wiring Diagram is an essential resource for installers, detailing all electrical connections required for proper operation. It clearly illustrates the DC power connection points, specifying polarity and recommended wire gauges. Accessory wiring, including safety beams, keypads, and other control devices, is also meticulously mapped out.
Crucially, the diagram emphasizes proper grounding procedures to ensure safety and prevent electrical interference. Color-coded wires and labeled terminals simplify the installation process, minimizing errors. Understanding this diagram is paramount for a successful and safe installation of the RSW12UL swing gate operator, guaranteeing reliable performance.
RSW12UL Cover Removal and Installation
Accessing the internal components of the LiftMaster RSW12UL often requires cover removal for maintenance or troubleshooting. The procedure involves carefully releasing retaining clips or screws, typically located on the sides and bottom of the operator’s housing. It’s vital to disconnect power before attempting this step for safety.
Re-installation is the reverse process, ensuring the cover is securely fastened to maintain weather resistance and protect internal electronics. Proper alignment is key to prevent damage. This guide provides clear instructions and diagrams to facilitate safe and efficient cover removal and re-installation, preserving the operator’s integrity.