NuWave Oven User Manual: A Comprehensive Guide (Updated 12/11/2025)
Welcome! This comprehensive guide details the NuWave oven’s features, including Pro-Smart, Bravo, Bravo XL, and Primo models. Discover 50+ recipes and cooking instructions!
NuWave ovens represent a revolutionary approach to countertop cooking, blending convection, conduction, and infrared technologies for versatile performance. These multifunctional appliances, including the Pro-Smart Oven, Bravo Oven, Bravo XL, and Primo, are designed to simplify meal preparation and deliver consistently delicious results.
Unlike traditional ovens, NuWave models often eliminate the need for defrosting or preheating, saving valuable time and energy. They excel at cooking a wide range of foods – from frozen dinners and steaks to complete 12-pound turkeys – with adjustable temperature controls and numerous preset cooking options.
This user manual serves as your complete guide to unlocking the full potential of your NuWave oven. Whether you’re a seasoned chef or a beginner cook, you’ll find detailed instructions, helpful tips, and over 50 recipes to inspire your culinary creations. Prepare to experience a new level of convenience and flavor!
Understanding NuWave Oven Technology
NuWave ovens distinguish themselves through a unique combination of three core cooking technologies: convection, conduction, and infrared. Convection circulates hot air for even cooking, while conduction transfers heat directly through the cooking surface. The innovative infrared technology then penetrates food, cooking it from the inside out.
This trifecta results in faster cooking times, reduced energy consumption, and superior flavor retention. Unlike conventional ovens that primarily rely on external heat, NuWave’s infrared capability ensures food remains moist and tender. The 360° Surround Cooking feature further enhances evenness, eliminating hot spots.
Models like the Pro Plus 2 utilize these technologies to cook fresh or frozen foods without preheating. The Bravo XL, a 12-in-1 appliance, showcases the versatility of this technology, functioning as a grill, griddle, and more. Understanding these principles unlocks optimal cooking performance.
Safety Precautions
Prioritize safety when operating your NuWave oven. Always ensure the oven is placed on a stable, heat-resistant surface, away from flammable materials. Never immerse the oven base in water or other liquids to prevent electric shock. Use oven mitts or pot holders when handling hot cookware or removing food, as surfaces become extremely hot during operation.
Do not operate the oven with a damaged cord or plug. If the oven malfunctions, discontinue use and contact customer support. Supervise children closely when the oven is in use. Avoid touching the heating elements during or immediately after cooking.
Ensure proper ventilation around the oven during operation. Never block the air vents. Always unplug the oven when not in use and before cleaning. Refer to the full manual for detailed safety guidelines and warnings specific to your NuWave model.
Setting Up Your NuWave Oven
Begin setup by unboxing, inspecting for damage, and powering on the unit. Familiarize yourself with the control panel for optimal cooking experiences!
Unboxing and Initial Inspection
Carefully unpack your NuWave oven from its packaging, ensuring all components are present. Verify the oven itself, the cooking rack, and any included accessories like a roasting pan or drip tray. Thoroughly inspect the unit for any visible signs of damage incurred during shipping – dents, scratches, or broken parts.
Check the power cord for fraying or damage. If any damage is detected, do not plug in the oven and contact customer support immediately. Retain the original packaging for potential returns or warranty claims. Confirm the model number on the oven matches the one on your purchase receipt. A quick visual check ensures you received the correct NuWave oven – Pro-Smart, Bravo, Bravo XL, or Primo – as ordered. Proper initial inspection safeguards your investment and ensures safe operation.
Powering On and Initial Setup
Before first use, ensure the NuWave oven is placed on a stable, heat-resistant surface with adequate ventilation. Plug the power cord into a grounded electrical outlet. The oven may prompt an initial setup sequence upon powering on – follow the on-screen instructions carefully. This often involves setting the clock and selecting your preferred units (Fahrenheit or Celsius).
Familiarize yourself with the control panel; it’s crucial for operation. Some models, like the Pro-Smart, may require connecting to your home Wi-Fi network for smart features. Run a brief test cycle – preheat the oven to a low temperature for a few minutes – to burn off any manufacturing residue. This may produce a slight odor, which is normal. Refer to your specific model’s quick start guide for detailed setup instructions.
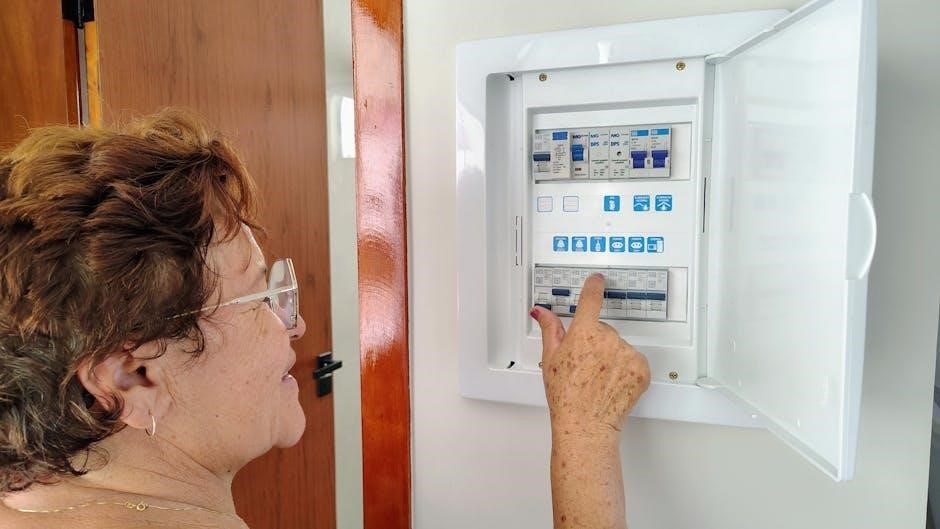
Control Panel Overview
The NuWave oven’s control panel features a digital display and various buttons or a touchscreen interface, depending on the model. Common controls include power, temperature adjustment, time setting, and function selection (convection, infrared, toast, air fry, broil). Preset buttons offer convenient cooking options for popular dishes.
Smart models, such as the Pro-Smart, may include Wi-Fi connectivity indicators and buttons for accessing smart features via a mobile app. The display shows the current cooking mode, temperature, and remaining time. Navigation buttons allow you to scroll through menus and adjust settings. Refer to the detailed diagrams in this manual to identify each control’s specific function and ensure optimal operation of your NuWave oven.

Cooking Modes & Functions
Explore versatile cooking! NuWave ovens offer convection, infrared, toasting, air frying, broiling, and grilling – providing diverse options for delicious meals and snacks.
Convection Cooking Explained
Understanding Convection: NuWave ovens utilize convection cooking, circulating hot air around the food for even and faster cooking. This method differs from traditional ovens, eliminating the need for preheating in many cases. Convection ensures consistent temperatures throughout the cooking chamber, resulting in perfectly cooked dishes every time.
Benefits of Convection: Experience reduced cooking times, typically 25% faster than conventional methods. Enjoy enhanced browning and crisping, ideal for roasting meats and vegetables. Convection cooking also promotes moisture retention, preventing food from drying out. The NuWave oven’s convection function is suitable for a wide range of recipes, from simple snacks to elaborate meals. It’s a key feature for achieving professional-quality results at home, offering a healthier alternative to deep frying.
Infrared Cooking Explained
The Science of Infrared: NuWave ovens employ infrared technology, directly heating food at the molecular level. Unlike conventional ovens that heat air, infrared energy penetrates the food’s surface, cooking it from the inside out. This process preserves natural flavors and nutrients, resulting in exceptionally tender and juicy results. Infrared cooking minimizes moisture loss, keeping food succulent and preventing dryness.
Advantages of Infrared: Benefit from faster cooking times and reduced energy consumption. Experience superior flavor and texture, as infrared cooking seals in juices and enhances natural aromas. The NuWave oven’s infrared function is particularly effective for cooking meats, poultry, and fish. It’s a versatile method suitable for both fresh and frozen foods, often eliminating the need for defrosting. Enjoy healthier cooking with minimal added fats, as infrared technology promotes even cooking without requiring excessive oil.
Toasting Function Details
Achieving Perfect Toast: The NuWave oven’s toasting function delivers consistently golden-brown results for various bread types, bagels, and pastries. Utilize the control panel to select your desired toast shade, ranging from light golden to dark and crispy. The oven automatically adjusts cooking time and temperature to achieve your preferred level of toasting.
Tips for Optimal Toasting: For even toasting, ensure bread slices are of uniform thickness. Avoid overcrowding the cooking area; toast in batches for best results. The NuWave oven’s toasting function isn’t limited to bread; experiment with toasting English muffins, waffles, or even pizza bagels. Regularly clean the crumb tray to prevent smoke and maintain optimal performance. Enjoy perfectly toasted delights with ease and convenience!
Air Frying Capabilities
Crispy Delights, Less Oil: The NuWave oven’s air frying function allows you to enjoy your favorite fried foods with significantly less oil. Utilizing rapid air circulation, it creates a crispy exterior and tender interior, mimicking traditional frying without the added fat. This feature is perfect for cooking french fries, chicken wings, mozzarella sticks, and more.
Optimizing Air Frying: For best results, lightly coat food with oil before air frying. Avoid overcrowding the cooking area to ensure even cooking and maximum crispiness. Shake or flip food halfway through the cooking process for uniform browning. Experiment with different seasonings and marinades to enhance flavor. The NuWave oven’s air frying capability offers a healthier and convenient way to indulge in your fried food cravings!
Broiling and Grilling with NuWave
Achieve Sizzling Results: The NuWave oven excels at both broiling and grilling, offering a convenient indoor alternative to outdoor cooking. The high, direct heat quickly sears the surface of foods, creating beautiful grill marks and a delicious caramelized flavor. This function is ideal for cooking steaks, burgers, fish, chicken, and vegetables.
Tips for Perfect Broiling/Grilling: Position food closer to the heating element for more intense heat and faster cooking. Use a broiler pan or grilling rack to elevate food and allow for even heat circulation. Monitor food closely during broiling/grilling to prevent burning. The NuWave oven’s versatile capabilities deliver restaurant-quality broiled and grilled dishes right in your kitchen, simplifying meal preparation and expanding your culinary options!
Using the NuWave Oven
Get Cooking! Explore preheating instructions, cooking time/temperature guidelines, and compatible vessels for optimal results. Enjoy the included recipe book with 50+ options!
Preheating Instructions
Achieving Optimal Cooking Temperatures: Preheating your NuWave oven is crucial for consistent and delicious results. While some models, like the Pro Plus 2, boast no preheating or defrosting needed, others benefit significantly from this step. Generally, for convection or infrared cooking, preheat to the recipe’s specified temperature.
To preheat, simply select your desired cooking mode and temperature using the control panel. Allow the oven to reach the set temperature – the indicator light will typically signal when preheating is complete. Preheating times vary depending on the model and temperature, but usually range from 5 to 15 minutes.
For quicker cooking, especially with frozen foods, consider utilizing the NuWave oven’s ability to cook directly from frozen, bypassing the preheating stage altogether, if the recipe allows. Always refer to the recipe book for specific preheating recommendations for each dish. Proper preheating ensures even cooking and optimal texture.
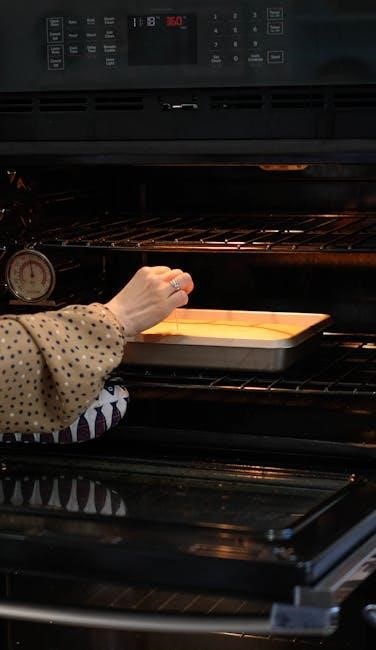
Cooking Time and Temperature Guidelines
Mastering NuWave Cooking: Cooking times and temperatures will vary based on the NuWave model and the food being prepared. The included recipe book offers 50+ tested recipes with precise guidelines. However, general recommendations exist for common foods. For meats, utilize a meat thermometer to ensure safe internal temperatures are reached.
Convection cooking typically requires lower temperatures and shorter cooking times compared to traditional ovens. Infrared cooking excels at quickly searing and browning. Adjust temperatures accordingly – start with lower settings and increase as needed. Always monitor food closely during the initial cooking stages.
The NuWave oven’s 360° Surround Cooking technology promotes even heat distribution, minimizing the need for frequent turning. Remember, these are guidelines; experimentation and personal preference are encouraged. Refer to the manual for preset cooking options and specific temperature ranges for various food types.
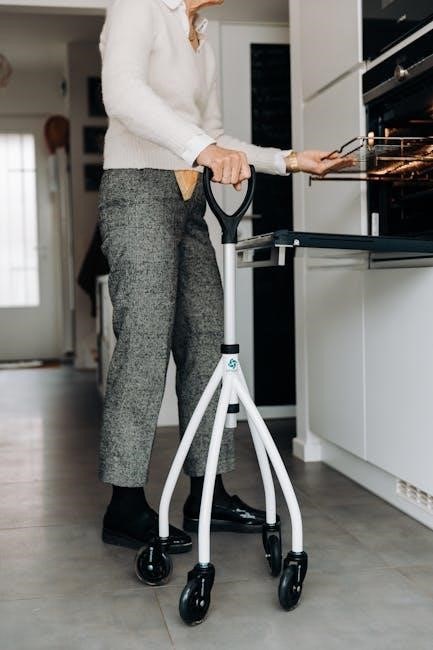
Using Different Cooking Vessels
Versatility in Cooking: The NuWave oven accommodates various cooking vessels, enhancing its functionality. Any pan suitable for a conventional oven – glass, ceramic, metal – can generally be used within the NuWave. However, ensure the vessel fits comfortably within the cooking cavity, allowing for proper air circulation.
The included cooking rack is ideal for roasting and elevating food, promoting even cooking. Duralon Blue Non-Stick cookware is a compatible option, offering easy food release and cleanup. Avoid using excessively large or tall vessels that may obstruct the heating elements.
When air frying, utilize perforated or mesh baskets to allow for optimal airflow. Always check the vessel’s temperature compatibility before use. Remember to handle hot vessels with oven mitts to prevent burns. Experiment with different vessels to discover what works best for your favorite recipes!
Recipe Book Overview (50+ Recipes)
Culinary Inspiration Awaits: Your NuWave oven includes a comprehensive recipe book boasting over 50 diverse recipes! This manual features culinary creations spanning breakfast delights, flavorful appetizers, vibrant vegetable dishes, succulent meats, and decadent desserts. Recipes are designed to showcase the oven’s versatility, utilizing convection, infrared, and air frying capabilities.

The recipe book provides clear, step-by-step instructions, alongside suggested cooking times and temperatures. Discover how to effortlessly prepare frozen dinners without defrosting, thanks to the oven’s rapid cooking technology. Explore recipes for grilling, roasting, and baking, all within a single appliance.
Beyond the included recipes, the manual encourages experimentation and customization. Adapt your favorite traditional recipes to the NuWave oven for consistently delicious results. Enjoy a world of culinary possibilities!
Cleaning and Maintenance
Keep it Sparkling! Daily cleaning ensures optimal performance. For deeper cleaning, follow the manual’s instructions, and troubleshoot common issues easily with our guide.
Daily Cleaning Procedures
Maintaining a pristine NuWave oven is simple with these daily steps. After each use, always ensure the oven has completely cooled down before beginning any cleaning process. Gently wipe down the interior surfaces with a soft, damp cloth to remove any food splatters or residue. Avoid using abrasive cleaners or scouring pads, as these can damage the non-stick coating.
The cooking pan and rack are dishwasher safe for convenient cleaning, or can be washed by hand with warm, soapy water. Pay close attention to removing any baked-on food particles. Regularly check and empty the drip pan to prevent grease buildup and potential odors. A quick wipe-down of the exterior with a damp cloth will keep your NuWave oven looking its best. Consistent daily cleaning will prolong the life of your appliance and ensure optimal cooking performance.
Deep Cleaning Instructions
For a thorough clean, perform these steps monthly, or as needed; Begin by disconnecting the NuWave oven from the power source. Remove all components – the cooking pan, rack, and drip pan. These can be soaked in warm, soapy water for easier cleaning. For stubborn, baked-on residue inside the oven cavity, create a paste of baking soda and water. Apply this paste, let it sit for 20-30 minutes, then gently scrub with a non-abrasive sponge.
Rinse thoroughly with a damp cloth, ensuring no baking soda remains. Clean the exterior with a mild cleaning solution. Inspect the heating elements and carefully wipe them down if necessary, avoiding any water contact. Reassemble all components once completely dry. A deep clean ensures optimal performance and extends the lifespan of your NuWave oven, maintaining food safety and hygiene.
Troubleshooting Common Issues

If your NuWave oven isn’t heating, first ensure it’s properly plugged in and the power outlet is functioning. Check the control panel settings – confirm the timer isn’t set to zero and the desired cooking mode is selected. If the oven shuts off mid-cycle, it may be due to a power surge or overheating; allow it to cool before restarting. For uneven cooking, ensure food is properly positioned on the rack and isn’t overcrowded.
If error messages appear, consult the full user manual for specific codes. If issues persist, avoid attempting self-repair; contact NuWave customer support for assistance. Regular cleaning and proper usage, as outlined in this manual, can prevent many common problems and ensure optimal performance.

Specific NuWave Oven Models
Explore dedicated guides for the Pro-Smart, Bravo, Bravo XL, and Primo ovens! Each section provides tailored instructions and features for your specific NuWave model.
NuWave Pro-Smart Oven Guide
The NuWave Pro-Smart Oven represents a pinnacle of countertop cooking technology, blending convection, conduction, and infrared heating for remarkably versatile results. This guide focuses specifically on maximizing your Pro-Smart experience. Understanding its smart features is key; the oven boasts pre-programmed settings for various foods, simplifying meal preparation.
Initial setup involves connecting to the NuWave app for remote control and access to expanded recipe options. The control panel offers intuitive navigation, allowing precise temperature and time adjustments. Explore the benefits of using different cooking vessels – from standard baking dishes to specialized NuWave accessories. Remember to consult the included recipe book for inspiration, and don’t hesitate to experiment with your favorite dishes!
Regular cleaning, as detailed in the maintenance section, will ensure optimal performance and longevity of your Pro-Smart Oven.
NuWave Bravo Oven Instructions
The NuWave Bravo Oven is a 12-in-1 countertop marvel, functioning as a grill, griddle, toaster oven, and more. Begin by ensuring proper ventilation around the unit during operation. Familiarize yourself with the digital control panel; it governs cooking modes, temperature, and timer settings. The Bravo oven excels at air frying, convection baking, and broiling, offering diverse cooking options.
Preheating is recommended for optimal results, particularly when baking or roasting. Utilize the included recipe book for guidance, or explore online resources for Bravo-specific recipes. Remember that cooking times may vary depending on food thickness and quantity. The Bravo oven accommodates various cookware, but always ensure it’s oven-safe.
Regular cleaning of the drip tray and interior is crucial for maintaining performance and hygiene. Refer to the detailed cleaning instructions for best practices.
NuWave Bravo XL Features
The NuWave Bravo XL boasts a generous 30-quart XL capacity, making it ideal for families or larger meals. This 12-in-1 countertop appliance combines the functionality of an oven, grill, griddle, and air fryer, offering exceptional versatility. Key features include precise temperature control, multiple cooking presets, and a user-friendly digital display.
Its expanded cooking surface allows for preparing larger portions with ease. The Bravo XL excels at air frying, delivering crispy results with minimal oil. It also features a dedicated broiling function for achieving perfectly browned dishes. The unit’s non-stick interior simplifies cleaning, while the included accessories enhance its capabilities.
Explore the diverse cooking modes to unlock the full potential of your Bravo XL, from baking and roasting to toasting and dehydrating.
NuWave Primo Oven Details
The NuWave Primo represents a significant advancement in countertop cooking technology, combining convection, conduction, and infrared heating for remarkably efficient and versatile performance. This oven is designed to cook food quickly and evenly, often eliminating the need for preheating or defrosting. It’s capable of handling a wide range of cooking tasks, from roasting a 12-pound turkey to preparing simple snacks.

The Primo features adjustable temperature settings and numerous pre-programmed cooking options, simplifying meal preparation. Its compact design makes it suitable for kitchens of all sizes, while its durable construction ensures long-lasting reliability. The Primo’s unique cooking system promotes healthier cooking by reducing the need for added fats and oils.
Refer to the included manual for detailed instructions and a collection of 50+ recipes.