West Bend Automatic Bread Maker Manual: A Comprehensive Guide
This guide provides comprehensive support for West Bend bread makers, covering models like 41095, 41200CF, and 41300. Find manuals, parts, and troubleshooting tips here!
Understanding West Bend Bread Maker Models
West Bend produced a variety of automatic bread makers, each with unique features and capacities. Popular models include the 41095 (1.5 lb loaf), 41200CF (2 lb loaf), 41300 (2.5 lb loaf), and 41400. Newer options, like the Hi-Rise 47413, offer a 3 lb capacity and 12 preset programs.
Understanding your specific model is crucial for finding the correct manual and replacement parts. West Bend machines often feature programmable settings, including options for white bread, whole wheat, and gluten-free baking. Identifying the model number – typically found on a label on the unit – unlocks access to tailored support and resources.
Identifying Your Specific Model Number
Locating your West Bend bread maker’s model number is essential for accessing the correct manual, parts diagrams, and troubleshooting assistance. The model number is typically found on a sticker or plate affixed to the appliance itself.
Check the bottom of the unit, the back panel, or inside the lid compartment. It’s often labeled as “Model Number,” “Catalog Number,” or simply “Model.” Common numbers include 41095, 41200CF, 41300, 41400, and 47413. Having this number readily available streamlines the process of finding specific information related to your machine’s operation and maintenance.

Locating West Bend Bread Maker Manuals Online
Finding your West Bend bread maker manual online is often the quickest solution. Sears Parts Direct is a valuable resource, offering downloadable manuals and detailed parts diagrams for various models, including the 41065. A simple web search using “West Bend bread maker manual” plus your specific model number (e.g., 41095) will yield numerous results.
Manufacturer websites and online appliance repair forums can also provide access to manuals. Be sure to verify the manual matches your exact model number to ensure accurate instructions and safety information. Digital manuals offer convenience and eliminate the need for physical storage.
Common West Bend Bread Maker Models (41095, 41200CF, 41300, 41400)
West Bend offers a range of bread maker models, with the 41095 being a popular choice for 1.5 lb loaves. The 41200CF also accommodates 2 lb loaves, while the 41300 increases capacity to 2.5 lbs. For larger families, the 41400 is a frequently sought-after model. The Hi-Rise model 47413 boasts a 3 lb capacity and 12 preset programs.
These machines often share similar functionalities, including programmable settings and crust control. Identifying your specific model is crucial for finding the correct manual and replacement parts. Knowing the model number ensures compatibility and optimal performance.
Understanding the Parts of Your West Bend Bread Maker
West Bend bread makers consist of key components for successful baking. The bread pan, typically horizontal, holds ingredients during mixing and baking. Kneading blades, often dual, ensure proper dough development. The control panel allows users to select programs, loaf size, and crust color.
Some models feature an ingredient dispenser for adding fruits, nuts, or seeds at the optimal time. Familiarizing yourself with each part’s function is essential. Proper assembly and understanding of these components contribute to consistent baking results and machine longevity.
Bread Pan and Kneading Blades
The bread pan, often non-stick, is crucial for shaping and baking your loaf. Ensure it’s securely locked into place before starting the machine. Kneading blades, typically dual, are responsible for mixing and developing gluten. Regularly inspect blades for wear and tear, as damaged blades impact dough consistency.
Properly attaching the blades to the shaft is vital; they should rotate freely. Cleaning these parts thoroughly after each use prevents dough buildup. Some pans are specifically designed for horizontal loaf shapes, common in West Bend models, maximizing baking efficiency.
Control Panel Overview
West Bend bread maker control panels feature digital displays and buttons for program selection, loaf size, and crust color. Common settings include basic, whole wheat, gluten-free, and dough-only cycles. The ‘Start’ and ‘Stop’ buttons initiate and halt the baking process. A timer function allows for delayed starts, ensuring fresh bread when desired.
Preset programs simplify baking, while manual settings offer customization. Understanding the panel’s symbols and functions is key to successful operation. Error codes displayed indicate potential issues, guiding troubleshooting efforts. Refer to your specific model’s manual for detailed explanations of each control.
Ingredient Dispenser (If Applicable)
Some West Bend models include an ingredient dispenser for adding fruits, nuts, or seeds at the optimal time during the baking cycle. This feature ensures even distribution without manual intervention. The dispenser typically has separate compartments for different additions, controlled by a timed release mechanism.
Properly filling and utilizing the dispenser is crucial for consistent results. Avoid overfilling, as this can disrupt the cycle. Refer to your model’s manual for specific instructions on dispenser capacity and operation. Regularly cleaning the dispenser prevents clogging and ensures accurate ingredient delivery, enhancing your bread-making experience.
Setting Up Your West Bend Bread Maker
Before first use, thoroughly clean the bread pan and kneading blade with warm, soapy water. Ensure they are completely dry before placing them into the machine. Position the bread maker on a stable, level surface, away from water sources. Plug the machine into a grounded outlet.
Carefully insert the kneading blade onto the drive shaft within the bread pan. Then, place the bread pan securely inside the bread maker. Familiarize yourself with the control panel and its functions, referencing your model’s manual for specific details. Proper setup is vital for optimal performance and consistent baking results.
Basic Bread Recipe for West Bend Machines
For a 1.5lb loaf, begin with 1 ¼ cups warm water, 3 cups bread flour, 2 tablespoons sugar, 1 ½ teaspoons salt, and 2 ¼ teaspoons active dry yeast. Add ingredients to the bread pan in the order recommended by your model’s manual – typically liquids first, then dry ingredients, with yeast last.
Select the “Basic” or “White Bread” setting, choosing your desired loaf size and crust color. Press start and allow the machine to complete its cycle. Once finished, carefully remove the bread pan and let the loaf cool completely before slicing and enjoying your freshly baked bread!
Using Pre-Programmed Settings
West Bend machines offer convenient pre-programmed settings for various bread types. The White Bread setting is ideal for classic loaves, while Whole Wheat caters to denser, nuttier breads. Explore the Gluten-Free setting for those with dietary restrictions, ensuring you use a gluten-free flour blend.
To utilize these, simply select the corresponding setting on the control panel, adjust loaf size and crust color as desired, and press start. Refer to your manual for specific ingredient recommendations for each setting, optimizing results for perfect bread every time. Experiment and enjoy!

White Bread Setting
The White Bread setting on your West Bend machine is designed for traditional loaves using standard wheat flour. This program typically includes cycles for kneading, rising, and baking, automatically managing the process. For best results, use bread flour with a protein content of 10-12% for optimal gluten development.
Generally, this setting works well with recipes calling for active dry yeast or instant yeast. Ensure accurate ingredient measurements, as this setting relies on precise ratios. Refer to your manual for specific liquid amounts and recommended cycle times. Enjoy consistently delicious, classic white bread!
Whole Wheat Setting
The Whole Wheat setting on your West Bend bread maker is specifically calibrated for recipes utilizing whole wheat flour. This setting often incorporates a longer kneading and rising time to accommodate the denser nature of whole wheat, ensuring proper gluten development. It’s crucial to use bread flour alongside whole wheat for a lighter texture.
Whole wheat flour absorbs more liquid, so recipes may require adjustments. The program typically includes a baking phase optimized for whole wheat’s unique characteristics. Consult your manual for recommended ingredient ratios and cycle durations. Expect a heartier, nuttier loaf with this setting!
Gluten-Free Setting

The Gluten-Free setting on your West Bend bread maker is designed for individuals avoiding gluten. This program utilizes a specialized cycle, often with extended kneading and rising times, to compensate for the lack of gluten’s elasticity. It’s vital to use a gluten-free flour blend specifically formulated for bread machines.
Gluten-free flours often require binding agents like xanthan gum or psyllium husk to mimic gluten’s structure. The setting may also include a higher baking temperature. Always refer to your manual for precise ingredient measurements and cycle length. Expect a slightly different texture compared to traditional bread!
Adjusting Loaf Size and Crust Color
West Bend bread makers offer customization through loaf size and crust color settings. Typically, you can select from options like 1.5 lb, 2 lb, or 3 lb loaf sizes, adjusting ingredient quantities accordingly. The crust color setting allows you to choose light, medium, or dark crusts, influencing baking time.
Experimenting with these settings is key to achieving your preferred results. A lighter crust requires less baking time, while a darker crust indicates a longer bake. Remember to consult your manual for specific guidance on ingredient adjustments for different loaf sizes. These features personalize your bread-making experience!
Troubleshooting Common Issues
Common problems with West Bend bread makers include bread not rising – often due to old yeast or incorrect ingredient measurements. A burning smell during baking could indicate excess sugar or a malfunctioning heating element; immediately unplug the machine. If the paddle remains stuck, ensure the bread has cooled completely before attempting removal.
Always double-check ingredient quantities and yeast freshness. Refer to your manual for specific error codes and solutions. Avoid using excessive liquids, as this can hinder rising. Regular cleaning and maintenance can prevent many issues. If problems persist, contact customer support for assistance.
Bread Not Rising

If your bread isn’t rising in your West Bend machine, the most frequent cause is expired or inactive yeast. Ensure your yeast is fresh by checking the expiration date and performing a proofing test. Incorrect ingredient measurements, particularly too much salt, can also inhibit yeast activity.
Insufficient liquid or excessively cold ingredients can hinder rising. Verify you’re using the correct amount of liquid and that ingredients are at room temperature. A poorly sealed bread pan can also cause issues; Finally, ensure the machine’s heating element is functioning correctly.
Burning Smell During Baking
A burning smell during baking often indicates ingredients are stuck to the bread pan or kneading blade, particularly sugar or fruit. Immediately unplug the machine and carefully remove the pan, inspecting for burnt residue. Excess sugar in the recipe, or ingredients falling off the paddle, are common culprits.
Ensure ingredients are properly measured and distributed. A malfunctioning heating element could also cause burning, though this is less common. If the smell persists after cleaning and adjusting the recipe, discontinue use and consult a qualified repair technician. Never leave the machine unattended during operation.
Paddle Stuck in Bread
A stuck paddle is a frequent issue with bread makers. Typically, it occurs because the dough is too sticky or hasn’t fully released from the kneading blade. After baking, allow the bread to cool slightly before attempting removal. Gently loosen the paddle with a non-metallic utensil, like a silicone spatula.
Avoid forceful removal, which can damage the bread or the machine. Using the correct amount of liquid in your recipe is crucial. If the paddle remains stuck, try soaking the bread pan in warm water to soften the dough. Regularly check the paddle for wear and tear, replacing it if necessary.
Cleaning and Maintenance
Regular cleaning extends your West Bend bread maker’s lifespan. Always unplug the machine before cleaning. The bread pan and kneading blade are typically dishwasher-safe, but hand washing is recommended to prevent damage. Wipe the exterior with a damp cloth; avoid abrasive cleaners.
Inspect the heating element for crumbs and gently remove them. Ensure all parts are completely dry before reassembling. Periodically check the ingredient dispenser (if applicable) for blockages; Proper maintenance prevents issues like burning smells and ensures optimal performance. Avoid immersing the main unit in water.

Replacing Parts

Finding replacement parts for your West Bend bread maker is crucial for continued use. Common replacements include kneading blades and bread pans. Sears Parts Direct is a valuable resource, offering parts diagrams and a wide selection of components. Online retailers also stock West Bend parts, identified by the specific model number.
When ordering, verify compatibility with your machine. Part numbers like 005891-000-000, 29881, and those specific to models 41400 or 41410 are essential for accurate ordering. Ensure a secure fit during installation to maintain baking performance and safety.

Finding Replacement Kneading Blades
Locating replacement kneading blades for your West Bend bread maker requires knowing your specific model number. These blades are prone to wear and tear, impacting dough kneading quality. Online retailers specializing in appliance parts, like Sears Parts Direct, are excellent starting points.
Search using the model number to ensure compatibility. Blades are often sold individually or in sets. Check customer reviews for blade durability and performance. When installing, ensure the blades are securely attached to the drive shaft to prevent issues during operation. Proper blade function is vital for successful bread making.
Locating Replacement Bread Pans
Finding a replacement bread pan for your West Bend machine is crucial if yours becomes damaged or worn. Again, knowing your exact model number (41095, 41200CF, etc.) is essential for compatibility. Online appliance parts retailers, such as Sears Parts Direct, frequently stock these pans.
Search specifically for your model to avoid purchasing an incorrect size or shape. Consider the pan’s coating – non-stick is common. Check for pans with dual kneading blade attachments if your original included them; Ensure the replacement pan fits snugly within the bread maker’s housing for optimal baking results;
Safety Precautions
Always unplug your West Bend bread maker before cleaning or attempting any maintenance. The kneading blade is sharp; handle with extreme care during removal and cleaning to prevent injury. Never immerse the appliance housing in water or other liquids.
Allow the bread pan and blade to cool completely before handling. Avoid touching hot surfaces during or immediately after baking. Keep the power cord away from hot surfaces. Supervise children when the bread maker is in operation. Do not operate the appliance with a damaged cord or plug.
Understanding Error Codes
West Bend bread makers utilize error codes to indicate issues during operation. While specific codes vary by model, common errors include “Err 1” signaling a power interruption or lid issue, and “Err 2” indicating a temperature sensor malfunction. “Err 3” often points to a heating element problem, requiring professional repair.
Consult your specific model’s manual for a complete list and troubleshooting steps. Resetting the machine by unplugging it for several minutes may resolve some errors. If an error persists, avoid attempting self-repair and contact customer support or a qualified appliance technician.
Advanced Baking Techniques
Beyond basic loaves, West Bend machines excel with advanced techniques. For adding fruits and nuts, use the ingredient dispenser during the delay timer cycle, ensuring even distribution. When making dough for other recipes, utilize the “Dough” setting, then shape and bake conventionally.
Experiment with different flour blends for unique textures. Consider a pre-soak for whole grains to improve rise. Remember to adjust liquid levels based on flour type. Explore recipes for cinnamon swirl, cheese bread, or even pizza dough – the possibilities are endless with a little creativity!
Adding Fruits and Nuts
Enhance your bread with fruits and nuts using your West Bend machine! The ingredient dispenser is ideal for timed additions, ensuring they don’t sink during the kneading process. For best results, chop larger fruits and nuts into smaller, uniform pieces.
Dried fruits generally work better than fresh, as they won’t release excess moisture. Add approximately 1 to 1.5 cups of total additions per loaf. Consider toasting nuts lightly beforehand to intensify their flavor. Experiment with combinations like cranberries and walnuts, or raisins and pecans for delightful variations!
Making Dough for Other Recipes
Your West Bend bread maker isn’t just for loaves! Utilize the “Dough” setting to create perfect dough for pizzas, rolls, or pastries. Simply add your ingredients, select the dough cycle, and let the machine handle the kneading.
Once the cycle completes, remove the dough and proceed with your chosen recipe. Remember that dough rise times may vary depending on ambient temperature. This feature saves significant time and effort compared to manual kneading, providing consistently excellent results for all your baking adventures. Enjoy versatile baking with your machine!
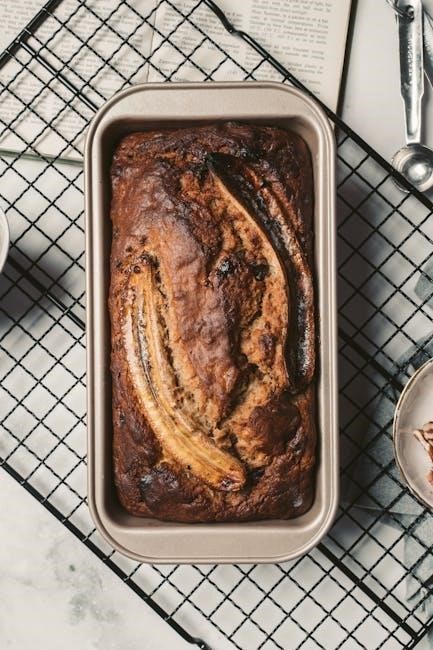
West Bend Bread Maker Recipes Beyond Basic Bread
Expand your baking horizons! Your West Bend machine excels beyond simple loaves. Explore recipes for cinnamon swirl bread, banana nut bread, or even savory herb breads. Experiment with adding fruits, nuts, and seeds to customize flavors.
Consider creating pizza dough using the dedicated dough cycle, or try sweet rolls and pastries. Online resources and cookbooks offer a wealth of inspiration. Don’t be afraid to adapt existing recipes for bread machine use, adjusting liquid levels as needed. Unlock the full potential of your appliance and enjoy a diverse range of baked goods!
Where to Find Additional Support and Resources
Need further assistance? Sears Parts Direct is a valuable resource for manuals, parts diagrams, and replacement components for your West Bend bread maker. Online forums and communities dedicated to bread making offer troubleshooting advice and recipe sharing.
Manufacturer websites may also provide downloadable manuals and FAQs. Explore YouTube for video tutorials demonstrating specific techniques or repairs. Don’t hesitate to contact customer support directly for personalized assistance with your model. Remember to have your model number readily available when seeking support!
Welcome to the ultimate guide for your West Bend automatic bread maker! This resource covers a wide range of models, including popular versions like the 41095, 41200CF, 41300, and 41400. We’ll explore everything from understanding your machine’s parts – the bread pan, kneading blades, and control panel – to mastering basic and advanced baking techniques.
Discover how to locate manuals online, troubleshoot common issues like rising problems or burning smells, and even find replacement parts when needed. This guide ensures you’ll enjoy fresh, homemade bread with ease!