Lexus ES330 (2004-2007) Wiring Diagram: Left Kick Panel Focus
Focusing on the left kick panel, this section details wiring access points for systems like the driver side junction block and body ECU.
Essential components reside here, influencing charging, audio, and overall electrical functionality within the 2004-2007 Lexus ES330 models.
The Lexus ES330 (2004-2007) employs a sophisticated electrical architecture, utilizing multiple junction blocks and wiring harnesses to distribute power and signals throughout the vehicle. Understanding this system is crucial for diagnostics, repairs, and aftermarket installations. The wiring is color-coded, though identifying specific circuits requires referencing detailed diagrams.
Furthermore, integration kits from companies like Metra are frequently used for audio upgrades, requiring careful attention to wiring compatibility, especially when dealing with factory radio connections and components like Parrot integration systems.
Locating the Left Kick Panel
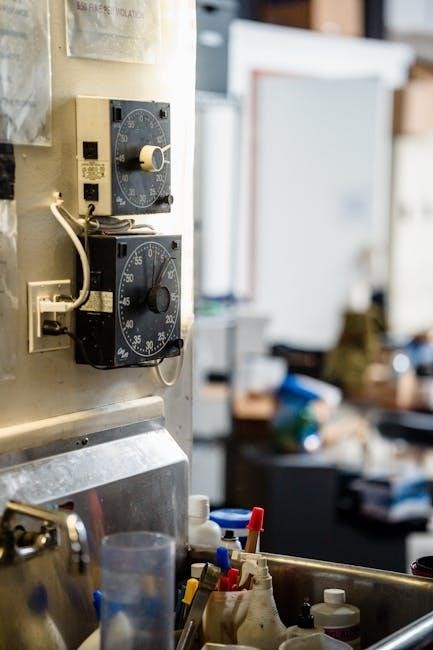
The left kick panel on the 2004-2007 Lexus ES330 is situated on the driver’s side of the interior, directly adjacent to the footwell. It’s a plastic panel covering the area where the dashboard meets the vehicle’s body. Accessing this panel is fundamental for reaching crucial wiring connections.
Typically, removal involves gently prying the panel away from the dashboard, often starting from the lower edge. Be cautious to avoid damaging the plastic clips securing it. Behind this panel resides the driver side junction block, a central hub for numerous electrical circuits.
This location is vital for accessing wiring related to the starting/charging system, audio components, and the body ECU, making it a primary focus for electrical troubleshooting and modifications.
Components Within the Left Kick Panel
Inside the left kick panel of the 2004-2007 Lexus ES330, several key components are housed. Most notably, the driver side junction block (J/B) serves as the central distribution point for many electrical circuits. This block contains numerous fuses and relays, protecting and controlling various systems.
The Body ECU is also frequently located attached to the driver side J/B, managing body-related functions. Wiring harnesses extend from these components, connecting to systems like the charging system, audio, and automatic A/C controls.
Careful inspection reveals wiring for the charge indicator and combination meter, essential for monitoring vehicle systems. Accessing these components requires careful panel removal and connector identification.
Wiring Diagram Overview: General Layout
The Lexus ES330 wiring diagrams (2004-2007) utilize a layered approach, with the left kick panel area representing a crucial node. Diagrams typically illustrate power distribution originating from the battery and engine room junction block.
These systems feed into the driver side junction block within the left kick panel, branching out to various components. Ground connections, denoted as Battery ground, are vital for circuit completion. Diagrams often employ color-coded wires for easy identification.
Understanding the layout requires tracing circuits from their power source, through fuses (like A107, A57), and to the intended destination. Online resources and CD1_Online formats offer detailed schematics.
Starting/Charging System Wiring
Essential starting and charging circuits originate near the left kick panel, connecting the battery, alternator, and related fuses (A107, A57, Alt-S).
Battery and Ground Connections
The battery’s positive cable directly feeds the engine room junction block, initiating the vehicle’s power distribution. Crucially, a robust ground connection, often found near the left kick panel and body, is vital for completing the circuit.
This grounding point, linked to the body ECU (located behind the driver’s side junction block), ensures stable electrical operation. Inspect these connections for corrosion, as poor grounding can cause numerous electrical issues. The battery ground strap’s integrity is paramount for reliable starting and charging.
Furthermore, the charge indicator and combination meter receive signals related to battery status, originating from these core connections. Proper voltage delivery relies on both positive and negative pathways functioning optimally.
Alternator Wiring Details
The alternator’s output is regulated and supplied to the charging system via specific wiring. Key components include the Alt-S (5A fuse) and AltlAm2 (30A fuse), protecting the circuit from overloads. The alternator itself connects to the engine room junction block, distributing power to recharge the battery and run electrical systems.
A dedicated wire transmits voltage information to the combination meter, displaying charging status. The A107 and A57 fuses also play a role in protecting the alternator circuit. Proper alternator function is crucial for maintaining battery charge and consistent electrical performance.
Inspect wiring for damage and ensure secure connections at the alternator and junction block for optimal charging efficiency.
Charging System Fuses (A107, A57, Alt-S, AltlAm2)
Critical to the Lexus ES330’s charging system are several fuses safeguarding its components. A107 and A57 provide primary protection for main charging circuits, while Alt-S (5A) and AltlAm2 (30A) specifically protect the alternator and related wiring. These fuses are typically located within the driver side junction block, accessible behind the left kick panel.
The A107 fuse safeguards the battery circuit, and A57 protects the charge indicator. Blown fuses indicate potential overloads or shorts, requiring diagnosis before replacement. Always use the correct amperage fuse to prevent further damage.
Regularly inspecting these fuses ensures reliable charging and prevents unexpected electrical failures.
Air Conditioning System Wiring
The A/C system’s wiring, including the blower motor controller, is partially routed and accessed near the dash reinforcement on the right side.
Automatic A/C Control Wiring
Delving into the automatic A/C control wiring reveals a complex network originating near the dashboard reinforcement, specifically on the right side. This area houses crucial connections for temperature sensors and control modules. The wiring extends towards the blower motor controller, situated within the dash harness, close to the right-side footwell light.

Understanding these connections is vital for diagnosing issues related to climate control functionality. The system relies on signals transmitted through these wires to regulate airflow and temperature accurately; Accessing these wires often requires careful disassembly of the dashboard components. Diagrams illustrate the precise routing and color coding for each wire, aiding in troubleshooting and repair. Proper identification is key to avoiding damage during any service work.

Blower Motor Controller Wiring
The blower motor controller wiring is a critical component within the Lexus ES330’s climate control system. Located within the dash harness, near the right-side footwell light, it receives signals from the automatic A/C control module. These signals dictate fan speed and operation.
Wiring diagrams detail the specific color codes for power, ground, and control wires connected to the blower motor controller. Troubleshooting often involves checking these connections for voltage and continuity. A faulty controller or damaged wiring can result in no airflow or inconsistent fan speeds. Accessing this component requires careful removal of dashboard panels. Correctly identifying each wire is essential for safe and effective repairs, preventing further electrical issues.
Radio/Audio System Wiring
Audio system wiring involves identifying factory radio colors for integration, particularly when adding aftermarket components like a Parrot system.
Diagrams pinpoint wire functions.
Factory Radio Wiring Colors & Identification
Decoding the factory radio harness is crucial for successful audio upgrades in the Lexus ES330 (2004-2007). Owners frequently seek color-coded wire identification when installing aftermarket systems, such as Parrot integration kits. Unfortunately, a comprehensive, readily available diagram specifically detailing every wire color is often elusive.
However, common findings indicate key wires to look for. Power wires are typically yellow or red, while ground wires are black. Speaker wires often utilize a combination of colors – white with a stripe, gray, or brown – to differentiate left, right, front, and rear channels. The illumination wire, controlling radio brightness with headlights, is often blue or blue/white.
Resources like Lexus Owners Club forums provide user-shared experiences and partial wiring maps, aiding in identification. Careful testing with a multimeter is recommended to confirm wire functions before making connections.
Parrot Integration Wiring Considerations
Integrating a Parrot hands-free system into a 2004-2007 Lexus ES330 requires careful wiring attention. A primary challenge is identifying the factory radio’s wiring harness connections, as detailed diagrams can be scarce. Owners often struggle to determine which wires control power, ground, speakers, and illumination.

The Parrot kit typically requires connections for 12V ignition, permanent 12V, ground, front speakers (positive and negative), and potentially rear speakers. Successfully tapping into these wires often involves accessing the wiring behind the factory radio, which may be located near the left kick panel.
Utilizing a wiring adapter specifically designed for Lexus vehicles can simplify the process, minimizing the need for direct wire splicing. Always verify wire functions with a multimeter before connecting to avoid damaging the vehicle’s electrical system.
Additional Wiring Diagrams & Systems
Beyond the kick panel, explore the engine room and driver side junction blocks for comprehensive Lexus ES330 electrical system diagrams and component locations.
Driver Side Junction Block Wiring
Located behind the left side of the dashboard, the Driver Side Junction Block (J/B) serves as a central hub for numerous electrical circuits within the 2004-2007 Lexus ES330. This block receives power directly from the battery via ground connections (B95, B105, B115) and distributes it to various systems.
Key connections include those for the charging system (A107, A57, Alt-S, AltlAm2), the combination meter, and the Body ECU, which is physically attached to this J/B. Understanding the wiring layout within this block is crucial for diagnosing issues related to starting, charging, and accessory functions. Accessing detailed wiring diagrams, potentially through resources like the Lexus CD1_Online electrical wiring diagram (2006-2019 models), is highly recommended for accurate troubleshooting and repair.
Engine Room Junction Block Wiring
Positioned on the left side of the engine compartment, the Engine Room Junction Block manages power distribution for engine-related components in the 2004-2007 Lexus ES330. It receives primary power from the battery and provides connections for the alternator, ensuring consistent charging system operation.
This block houses critical fuses (like A107, A57, Alt-S, AltlAm2) protecting vital circuits. Wiring extends from here to the driver side junction block, creating a network for vehicle systems. Detailed diagrams, such as those found in Lexus electrical wiring documentation (CD1_Online 2006-2019), are essential for tracing circuits and identifying potential faults. Proper understanding of this block’s wiring is vital for diagnosing starting, charging, and engine performance issues.
Combination Meter Wiring
The Combination Meter, or instrument cluster, receives crucial signals via dedicated wiring to display vital vehicle information in the 2004-2007 Lexus ES330. This includes speed, fuel level, temperature, and warning lights. It’s connected to the Body ECU (via the driver side junction block) and the charging system, receiving data for the charge indicator.
Wiring diagrams (referenced in Lexus documentation CD1_Online 2006-2019) illustrate the complex network of connections. Troubleshooting requires careful tracing of wires from the meter to the relevant sensors and control modules. Issues can manifest as inaccurate readings or non-functional gauges. Understanding the wiring layout is paramount for effective diagnosis and repair, ensuring accurate driver feedback.
Body ECU Wiring (Driver Side J/B)
The Body ECU, crucial for numerous vehicle functions, is physically attached to the driver side junction block (J/B) located behind the left side of the dashboard in the 2004-2007 Lexus ES330. This J/B serves as a central connection point for many systems.
Wiring diagrams (detailed in Lexus electrical documentation CD1_Online 2006-2019) show the ECU’s connections to components like the combination meter, charging system, and various sensors. It manages features like power windows, door locks, and interior lighting. Accessing wiring information is vital for diagnosing issues related to these systems. Proper identification of wires within the J/B is essential for accurate repairs and modifications.
Accessing Lexus Wiring Diagrams (2006-2019 Models)
Comprehensive Lexus wiring diagrams, covering models from 2006-2019, are available in a CD1_Online format. While the ES330 spans 2004-2007, these later diagrams often contain compatible or similar wiring schematics, proving invaluable for troubleshooting.
Metra Integration Kits & Compatibility (RX330/RX350)
Metra offers a range of integration kits, primarily focused on the Lexus RX330 (2004-2006) and RX350 models. While specifically for those RX series vehicles, understanding Metra’s approach to Lexus wiring can inform ES330 integration projects.
These kits simplify aftermarket radio installation, providing harness adapters and necessary connections. Though not a direct fit for the ES330, the principles of wiring adaptation remain consistent. Metra’s online resources (metraonline.com) and their 1-800 support line can offer insights into compatible solutions. When modifying the ES330’s audio system, particularly around the left kick panel, referencing Metra’s wiring strategies can be beneficial for a seamless installation.